Introduction Link to heading
In this tutorial, we’ll create a simple chatbot application that supports both traditional request-response interactions and streaming responses. We’ll use GitHub Marketplace’s OpenAI GPT-4o model for this tutorial. We’ll use Spring AI to interact with the model and create a chatbot application. Backend will be created with Spring Boot and frontend will be created with React.
Project Requirements Link to heading
- Java 21
- React 19.0.0
- Maven 3.9.9
- Spring Boot 3.4.3
- Spring AI 1.0.0-M6
Project Setup Link to heading
- Clone https://github.com/umutdogan/spring-ai-chatbot repository and open with your favorite IDE (e.g. IntelliJ IDEA).
- Ensure that you have Java 21 and Maven installed on your system.
- Go to GitHub Marketplace Models and select OpenAI GPT-4o model as other models are not working as expected within this GitHub Marketplace offering with Spring AI.
- Click the name of the model (OpenAI GPT-4o) and click Use this model button.
- It will ask you to create a personal access token. Click
Get developer keyoption next to the GitHub option. - Select
Generate new token (classic)option in the opening window, give a name in theNotesection, select anExpirationdate. You don’t need to select anyscopes. Then click Generate token button. - It will show you the token. Note the token as it won’t be displayed again. We’ll use this
tokenas our API_KEY for calls. - Now go back to the model selection page, and you’ll notice two more parameters:
endpointandmodel. Note these also as we’ll use these in our project’sapplication.propertiesfile.
- Then, go back to your Spring AI project and follow these steps and update following lines in
application.propertiesin thesrc/main/resourcesdirectory.
spring.ai.azure.openai.api-key=your_api_key
spring.ai.azure.openai.endpoint=your_api_endpoint
spring.ai.azure.openai.chat.options.deployment-name=gpt-4o
- Build the project
mvn clean install
- Run the application:
mvn spring-boot:run
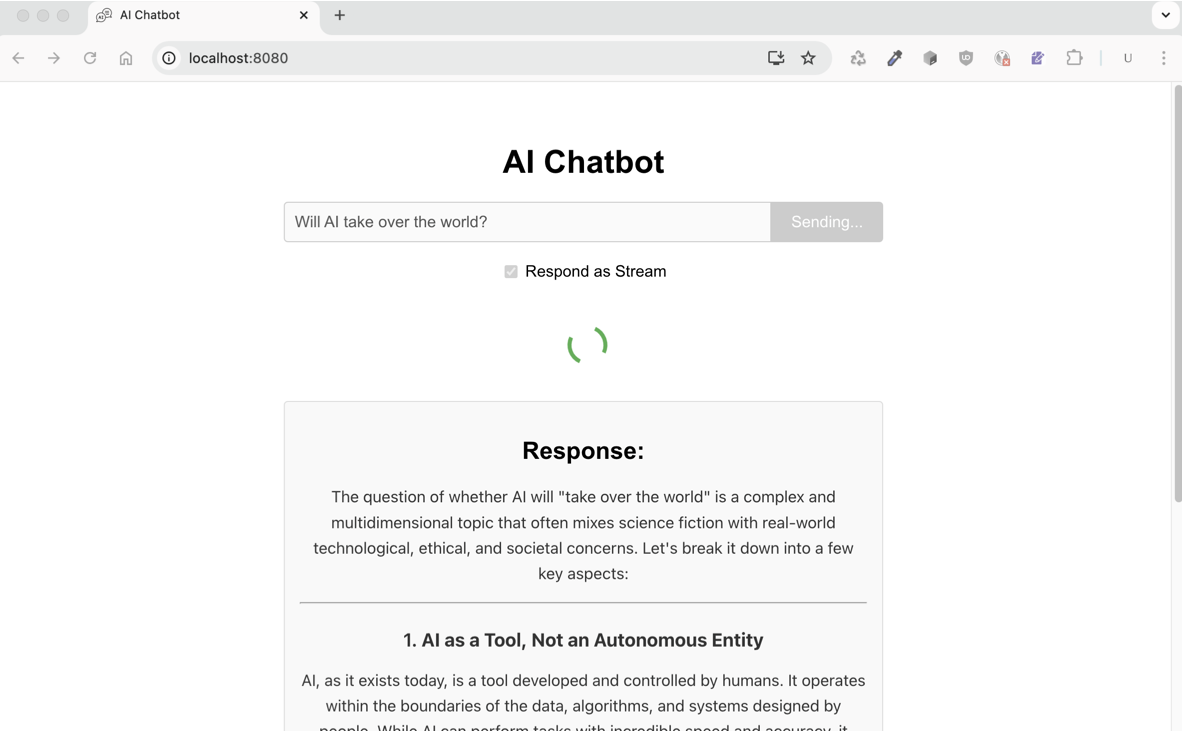
- Open http://localhost:8080 with your internet browser (Chrome, Safari etc.) and test the chat prompt options.

Spring AI Related Backend Code Summary Link to heading
The backend implementation of the Spring AI chatbot consists of these key components:
- ChatController.java: The controller handles both synchronous and streaming chat interactions.
- Constructor with Builder pattern for configuration.
- Standard request-response endpoint (/chat).
- Streaming response endpoint using Flux (/stream).
- The application relies on the configuration properties in
application.propertiesfile. - The controller implements a simple error handling for both endpoints.
React Related Frontend Code Summary Link to heading
The frontend is a straightforward React application focused on a chatbot interface that connects to the Spring Boot backend’s /chat and /stream endpoints. The frontend implementation consists of these key components:
- Chatbot.js: Handles the chat interface and API communication with Spring Boot endpoints:
- User input form for messages.
- Toggle between regular and streaming response modes.
- Two API communication methods:
- Regular mode: POST to /chat endpoint.
- Stream mode: GET from /stream endpoint with chunked responses.
- Loading states with a spinner animation.
- Markdown rendering with syntax highlighting for code blocks.
- Chatbot.css: Chatbot styling
- Layout and responsive container design.
- Form styling with input and button elements.
- Loading spinner animation.
- Stream toggle switch styling.
- Rich markdown content styling (headings, code, tables, lists, etc.).
- index.js: Entry point for the React application. Creates a root element and renders the App component within React.StrictMode.
- App.js: Main component that imports and renders the Chatbot component. Simple structure with just a single div containing Chatbot.
- App.css: Basic styling for the App component with centered text and padding.
- index.css: Global styles for the application. Sets up font families, margins, and text rendering.
You can review Chat Client API references to understand the framework classes and methods. Then apply those to your projects to customize the calls to the configured LLM.