In this blog post, we’ll try to understand what RAG means, how we can implement a RAG solution using Azure AI Studio and create an endpoint to use in our simple chat web app ( which uses Spring Boot for the backend and React Web for the front-end) to call the endpoint and ask questions and get relevant answers.
It is important to note that my approach is not the ideal way to implement an AI solution and there are different cloud vendors, programming languages, tools and approaches that can be followed. This should just shed a light for curious minds and rest is in your mind.
Also note that as this is a very rapidly changing technology, the screens, tools that we use in this tutorial might be obsolete soon. I can also say that because the standards are not set yet about AI tools, it is very tidious process to create even a simple RAG chat app. There are some good alternatives like Spring AI, Langchain4j for Java developers but they are not part of this blog post.
As a summary for the following sections;
- We’ll first try to understand the RAG concept and where it is used.
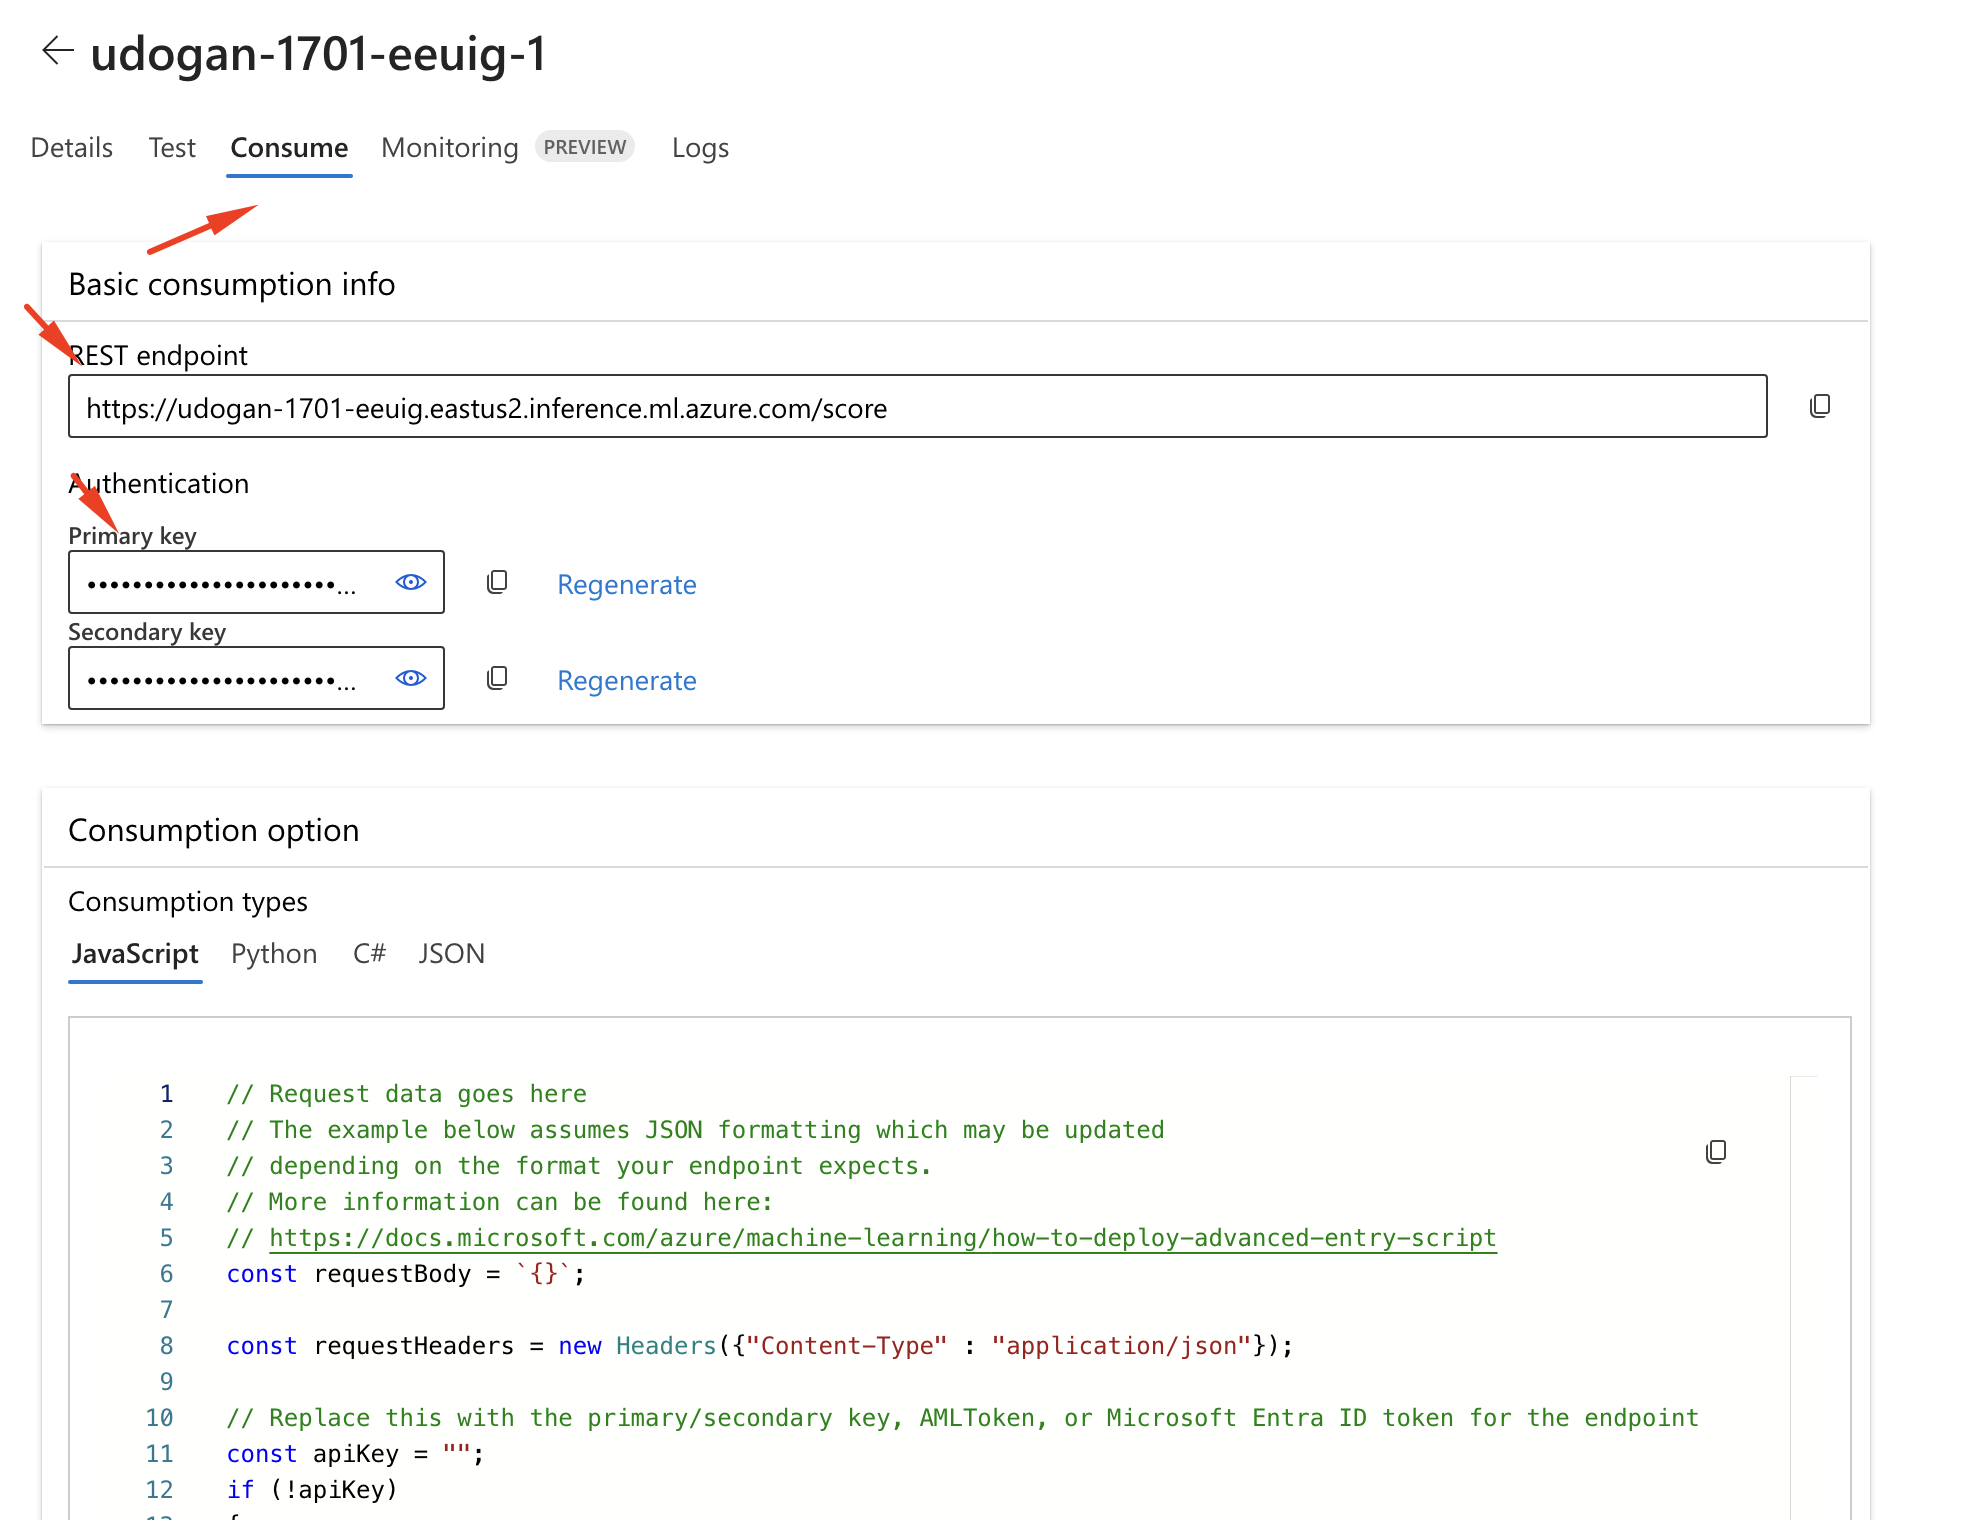
- Then create the heart of the application on Azure AI Studio using cloud tools. At the end of this section, we’ll have a REST endpoint and key to be used in our web app.
- Then we’ll create a simple web app (Spring Boot / React Web) which will be used to call the rest endpoint using a simple chat screen.
- Finally we’ll test the RAG capabilities of our app with some questions.
What is Retrieval Augment Generation (RAG)? Link to heading
Retrieval Augmented Generation (RAG) is a technique that grants generative artificial intelligence models information retrieval capabilities. It modifies interactions with a large language model (LLM) so that the model responds to user queries with reference to a specified set of documents, using this information to augment information drawn from its own vast, static training data. This allows LLMs to use domain-specific and/or updated information. Use cases include providing chatbot access to internal company data or giving factual information only from an authoritative source.
What is Azure AI Studio? Link to heading
Azure AI Studio is a comprehensive platform designed to help developers create, evaluate, and deploy generative AI models and custom copilots. It provides access to the latest generative AI models, including those from Azure OpenAI Service, and integrates them with applications through a unified API. The platform supports a wide range of use cases, offering prebuilt and customizable models, templates, and tools to streamline the development process. Azure AI Studio also emphasizes responsible AI development with configurable evaluations, safety filters, and security controls.
Creating Azure AI Hub Link to heading
Login to the Azure Portal and search for Azure AI Studio.
- Select Create menu and select Hub option from the menu.
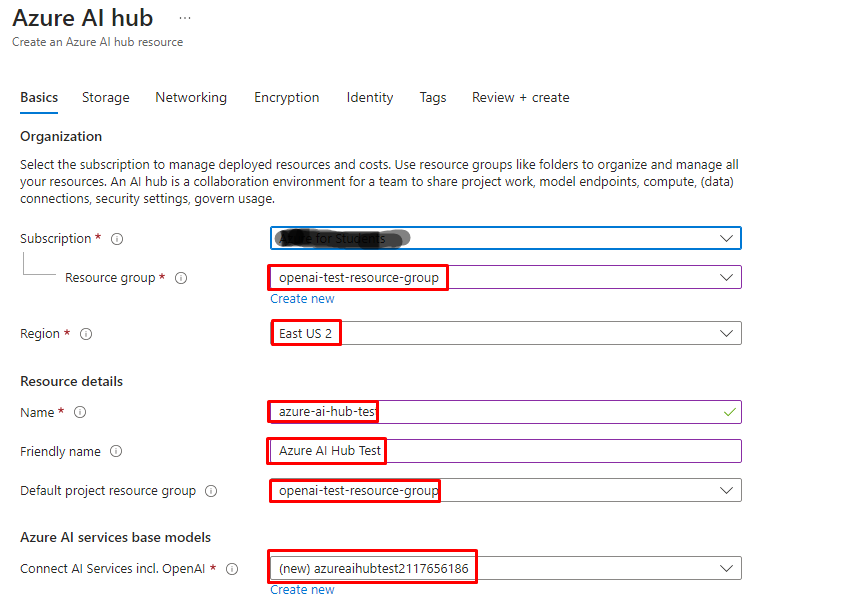
- Fill in the Basics section accordingly and click Next : Storage.
- Create a new Resource group or use your existing one.
- Select the Region.
- Give it a Name. (e.g. azure-ai-hub-test) and Friendly name.
- It will create an AI Service automatically.
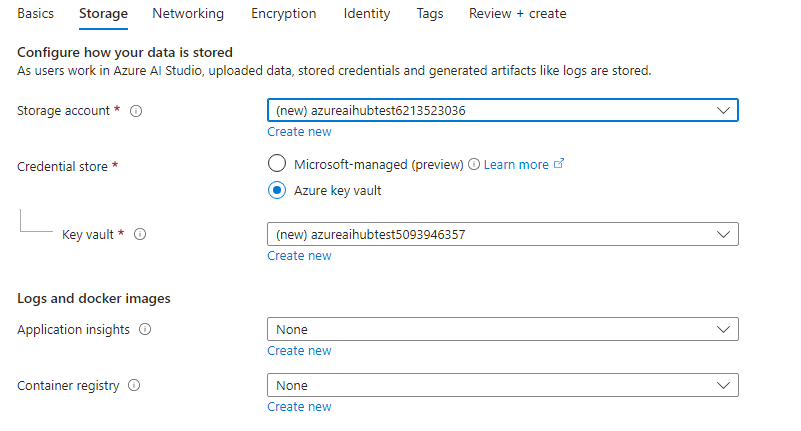
- In the Storage section, we’ll setup the storage options required to store data, credentials, logs etc. We’ll use default values in this screen.
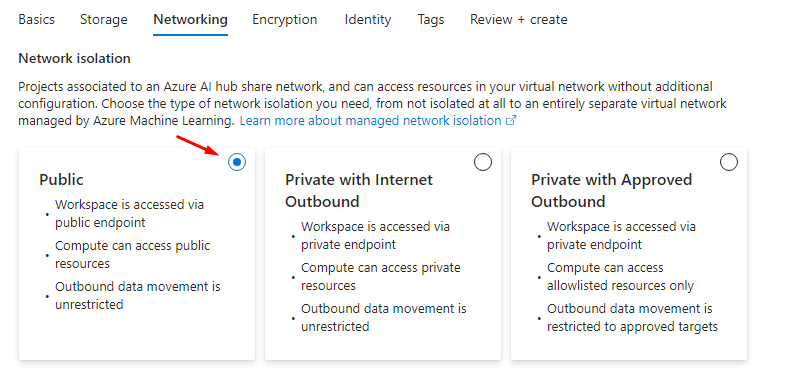
- We’ll keep the access as Public in Networking section to be able to access REST endpoint from our laptops but network isolation can be arranged based on your needs.
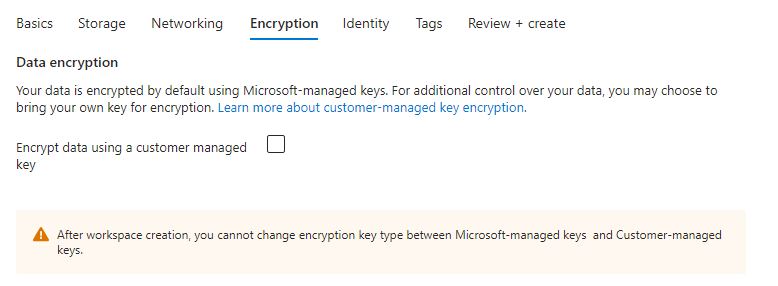
- Keep default values for Encryption and Identity tabs.
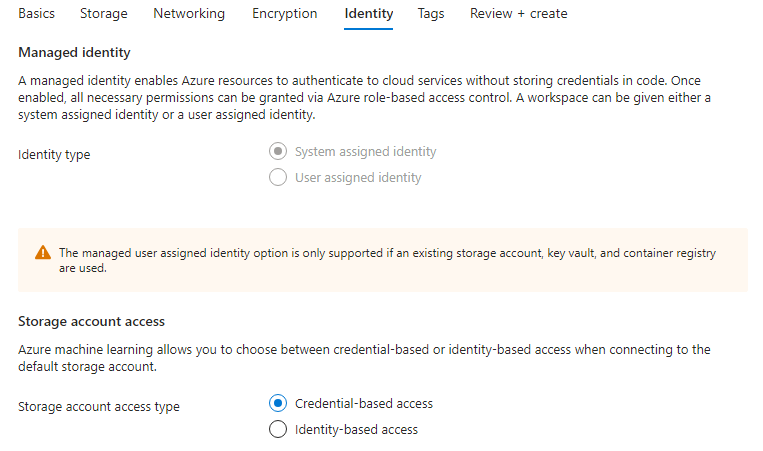
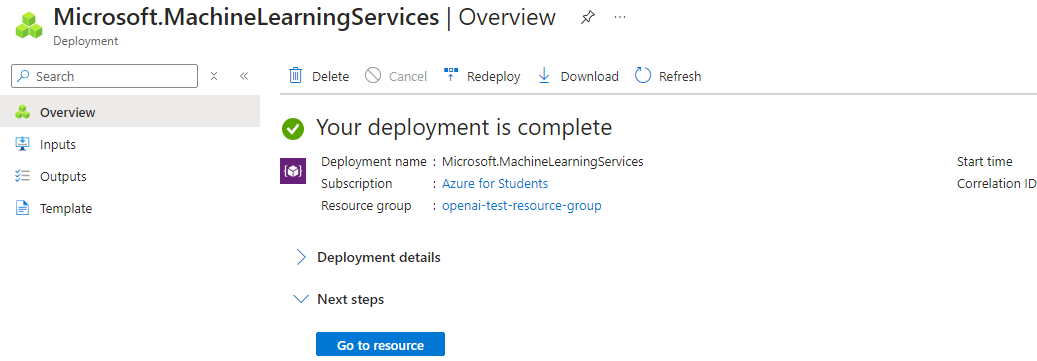
- Finally, click Review + create and then Create buttons to create resources. After couple minutes, deployment will be completed.
Review Azure AI Studio Link to heading
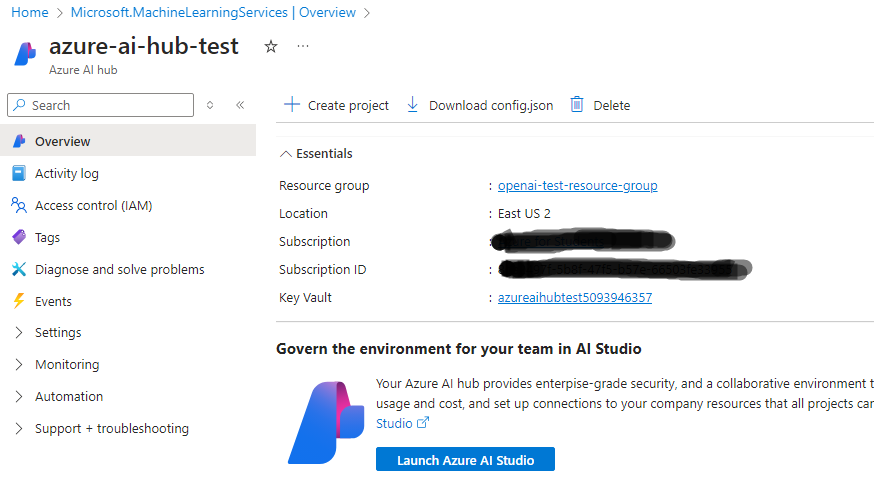
- Click Go to resource button and then it will take us to the Azure AI hub overview page, click Launch Azure AI Studio button.
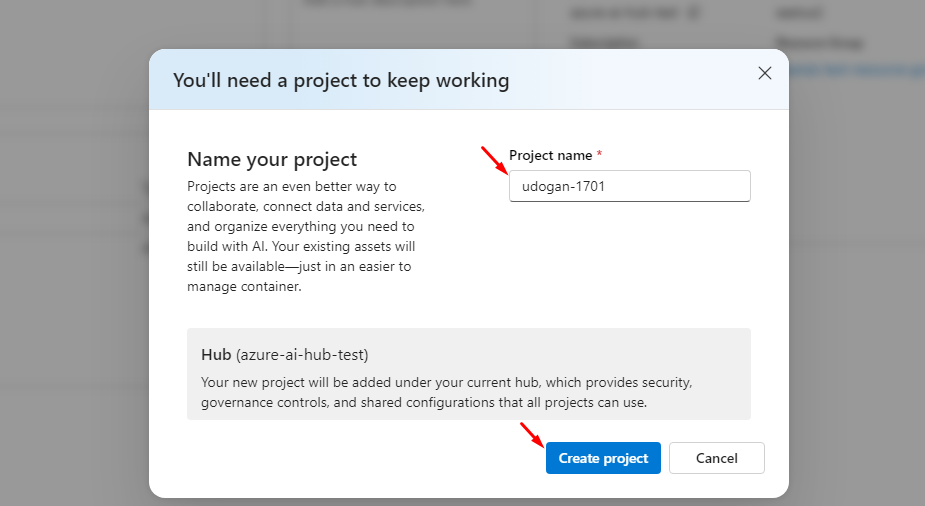
- If this is our first time creating a hub with a project, it will ask you to create a project under the new hub and name your project (it was not editable for me so accepted the default value for project name). Click Create project button.
Review Azure AI Foundry Link to heading
- Now it will take you to the AI Foundry page with selected project.
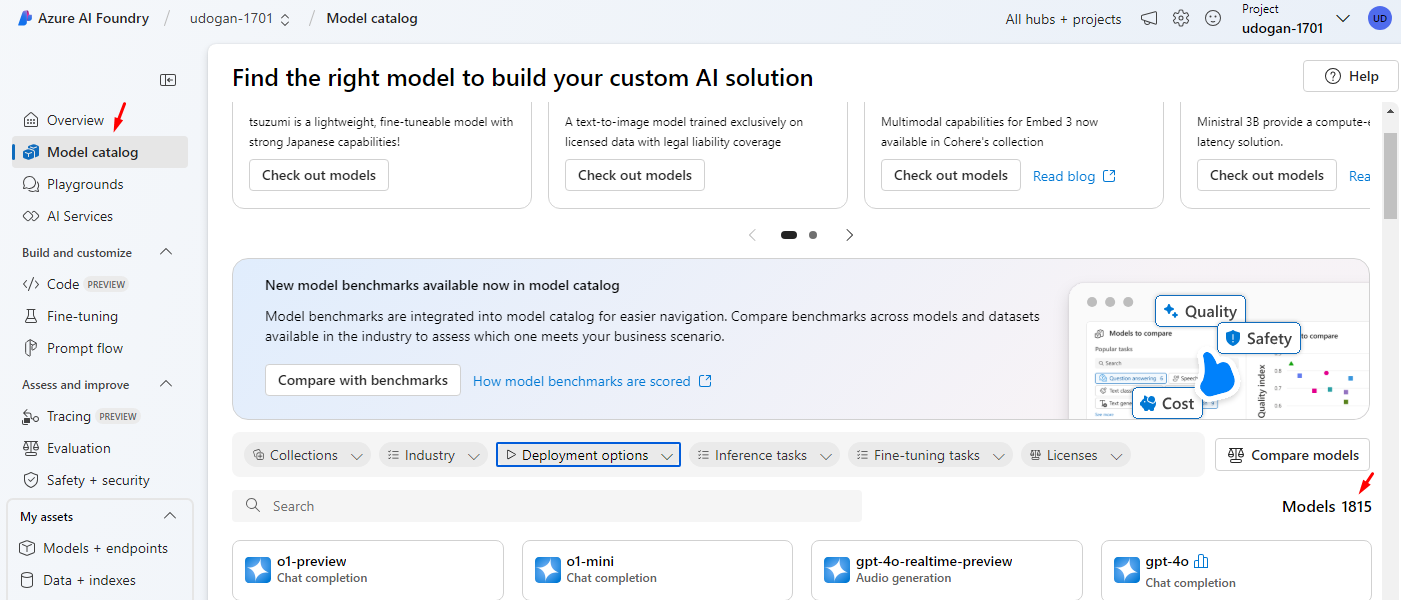
- You can click Model catalog from the left menu and browse thousands of models that will help you to build your custom AI solutions. You can even click Compare with benchmarks button to be able to compare the models based on accuracy, coherence, similarity, fluency, relevance etc.
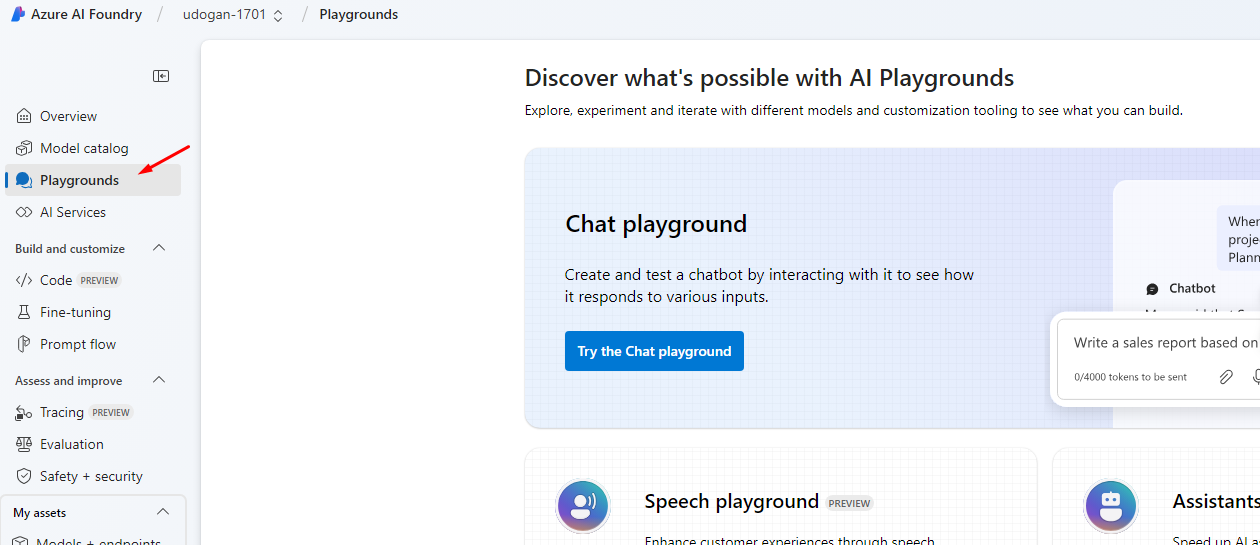
- Playgrounds menu is used to explore, experiment and iterate with different models and customization tooling to see what you can build. There are Chat, Speech, Assistants, Real-time audio, Images, Healthcare and Language playgrounds under this menu.
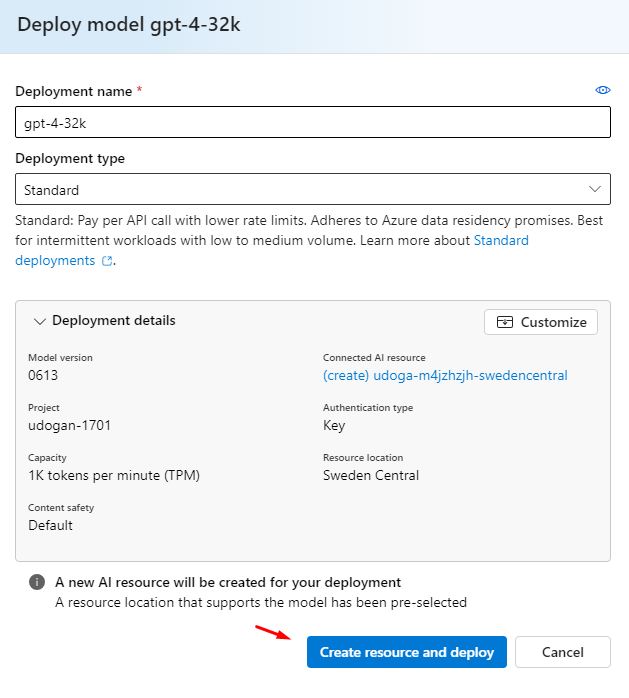
- Create a deployment by first opening Model catalog, filtering based on Serverless API deployment option and then selecting gpt-4-32k from the list. Deploy with default options by clicking Create resource and deploy button.

- After deployment, you can click Open in playground to open the playground with this deployment. You can chat and play with options in the playground.
- Prompt flow menu is used to create flows. A flow is the instruction set that implements the AI logic for your app. You can create a flow by cloning samples, importing local or stored files, or building from scratch.

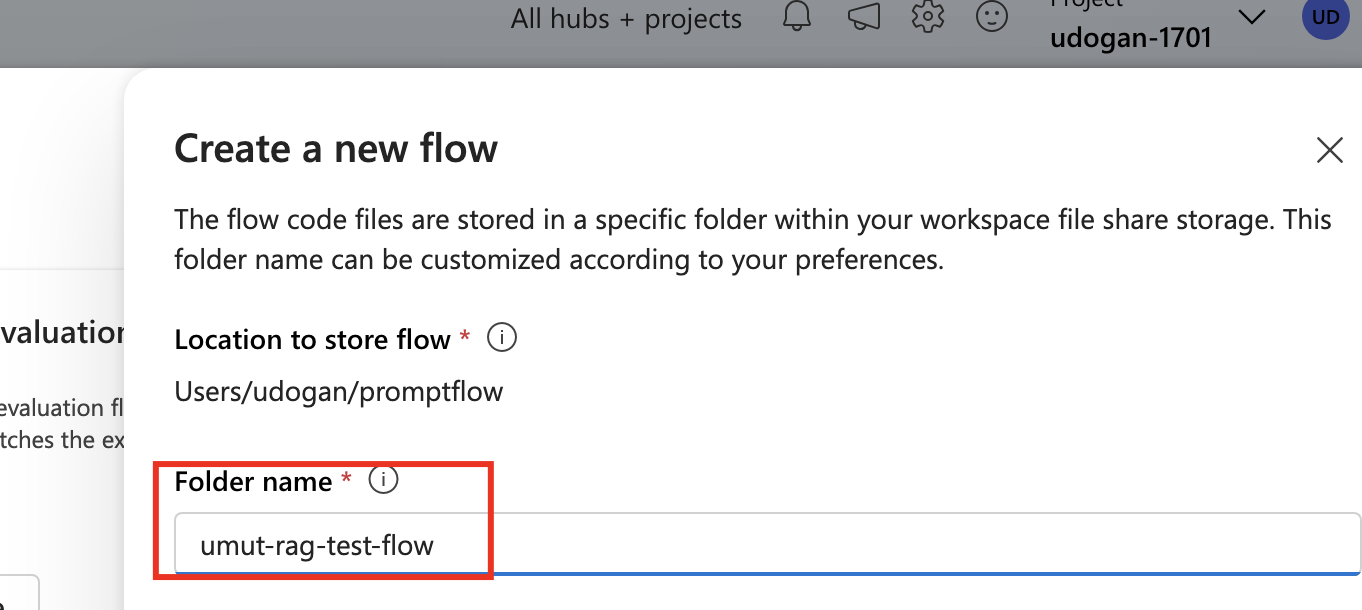
- Open the project and go to the Prompt flow menu as explained in the last section. Create a new Standard flow.
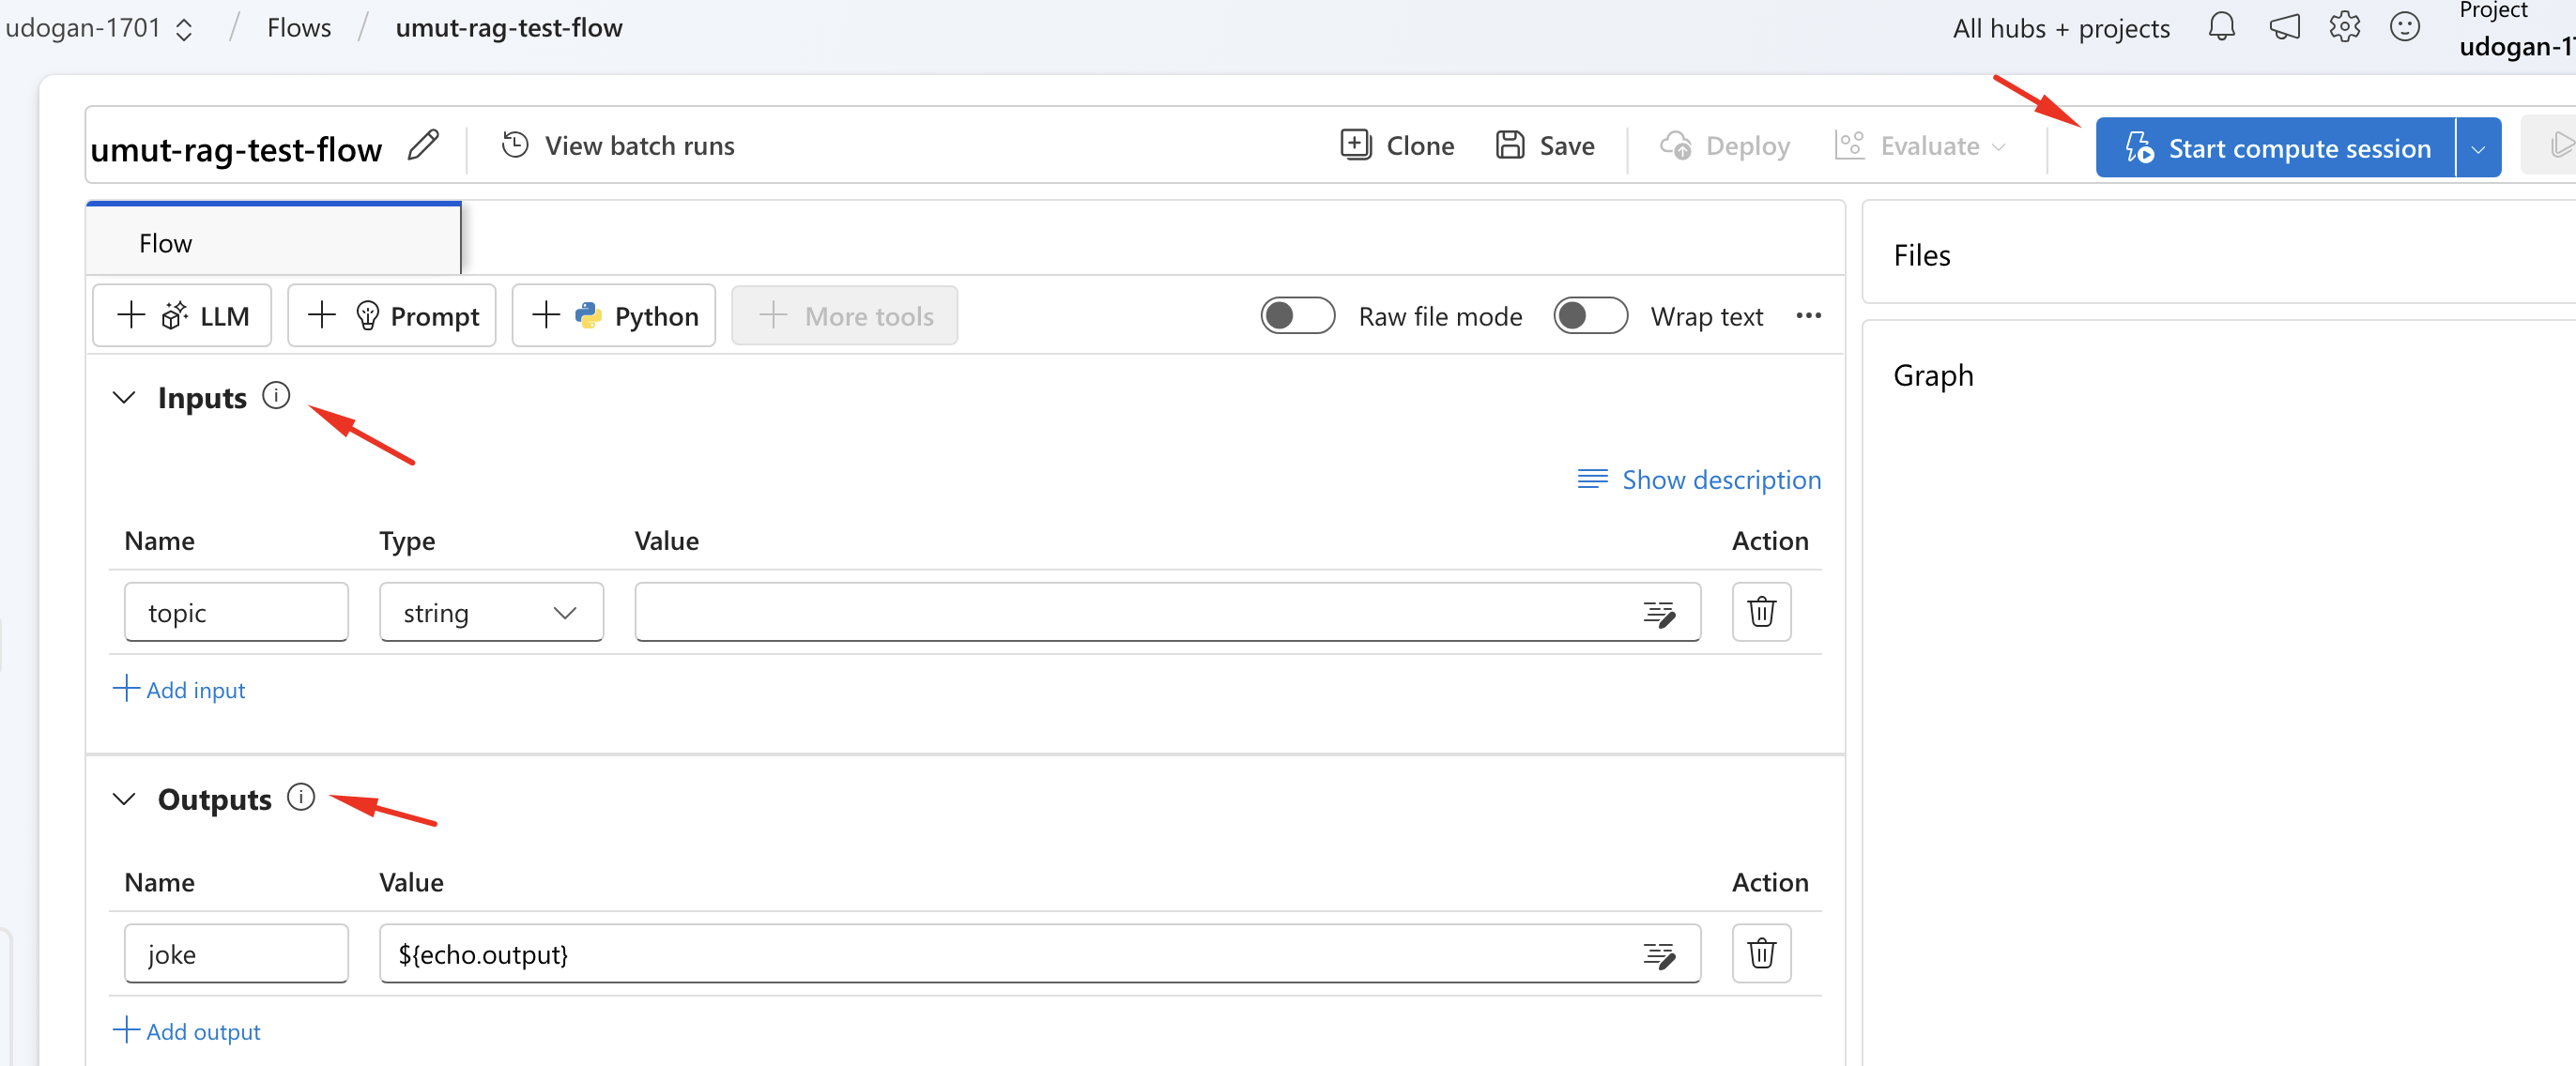
- Delete generated joke and echo steps within the flow as we’ll create our own steps. There should be only blank Inputs and Outputs section left. Click Start compute session button. It will take couple minutes to start.
Preparing Documents Link to heading
- To create a RAG project, we need internal documents to our company. Now go back to the left pane in project and select Data + indexes item under My assets menu.
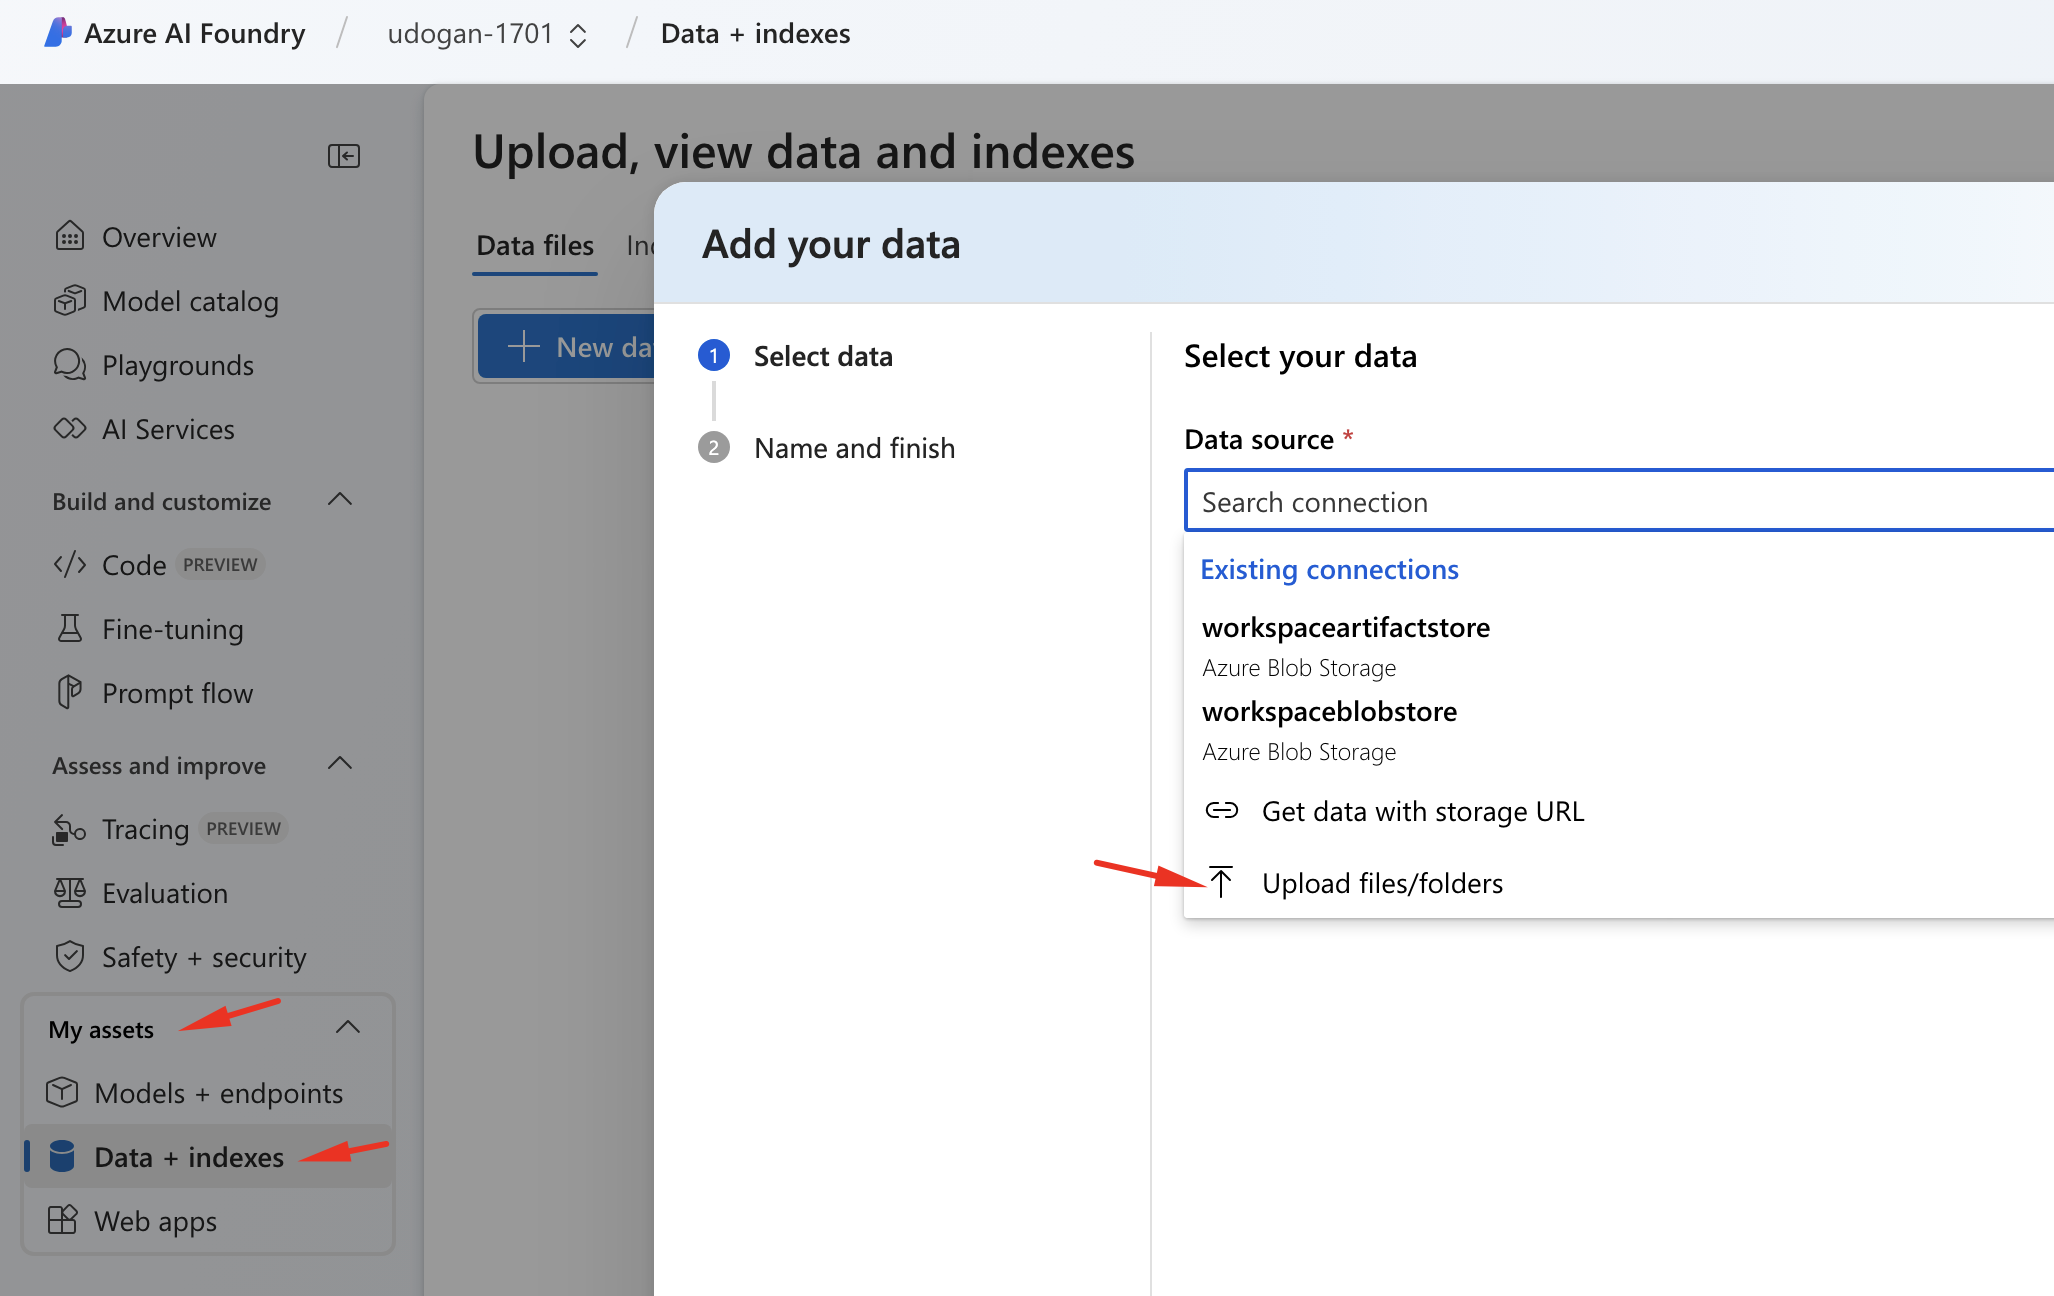
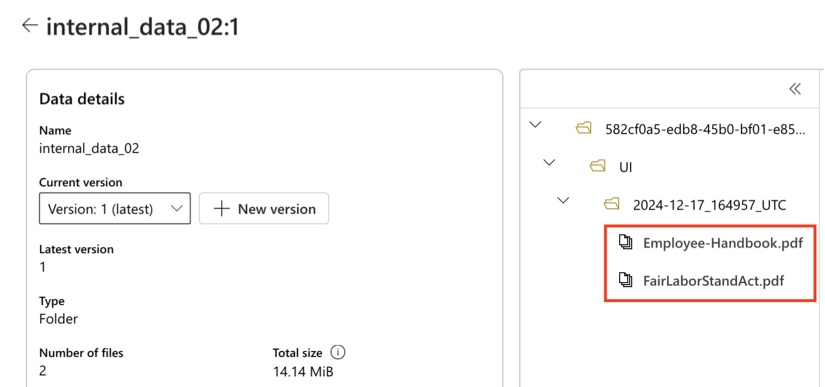
- Click + New data button under Data files section. Select and upload your internal documents, click Next, give it a name (e.g. internal_data_02) and click Create button.
- Go back to the left pane in project and select Data + indexes item under My assets menu and click + New index button under Indexes section. Select Data in Azure AI Studio option and select the data file name that we created in previous step.
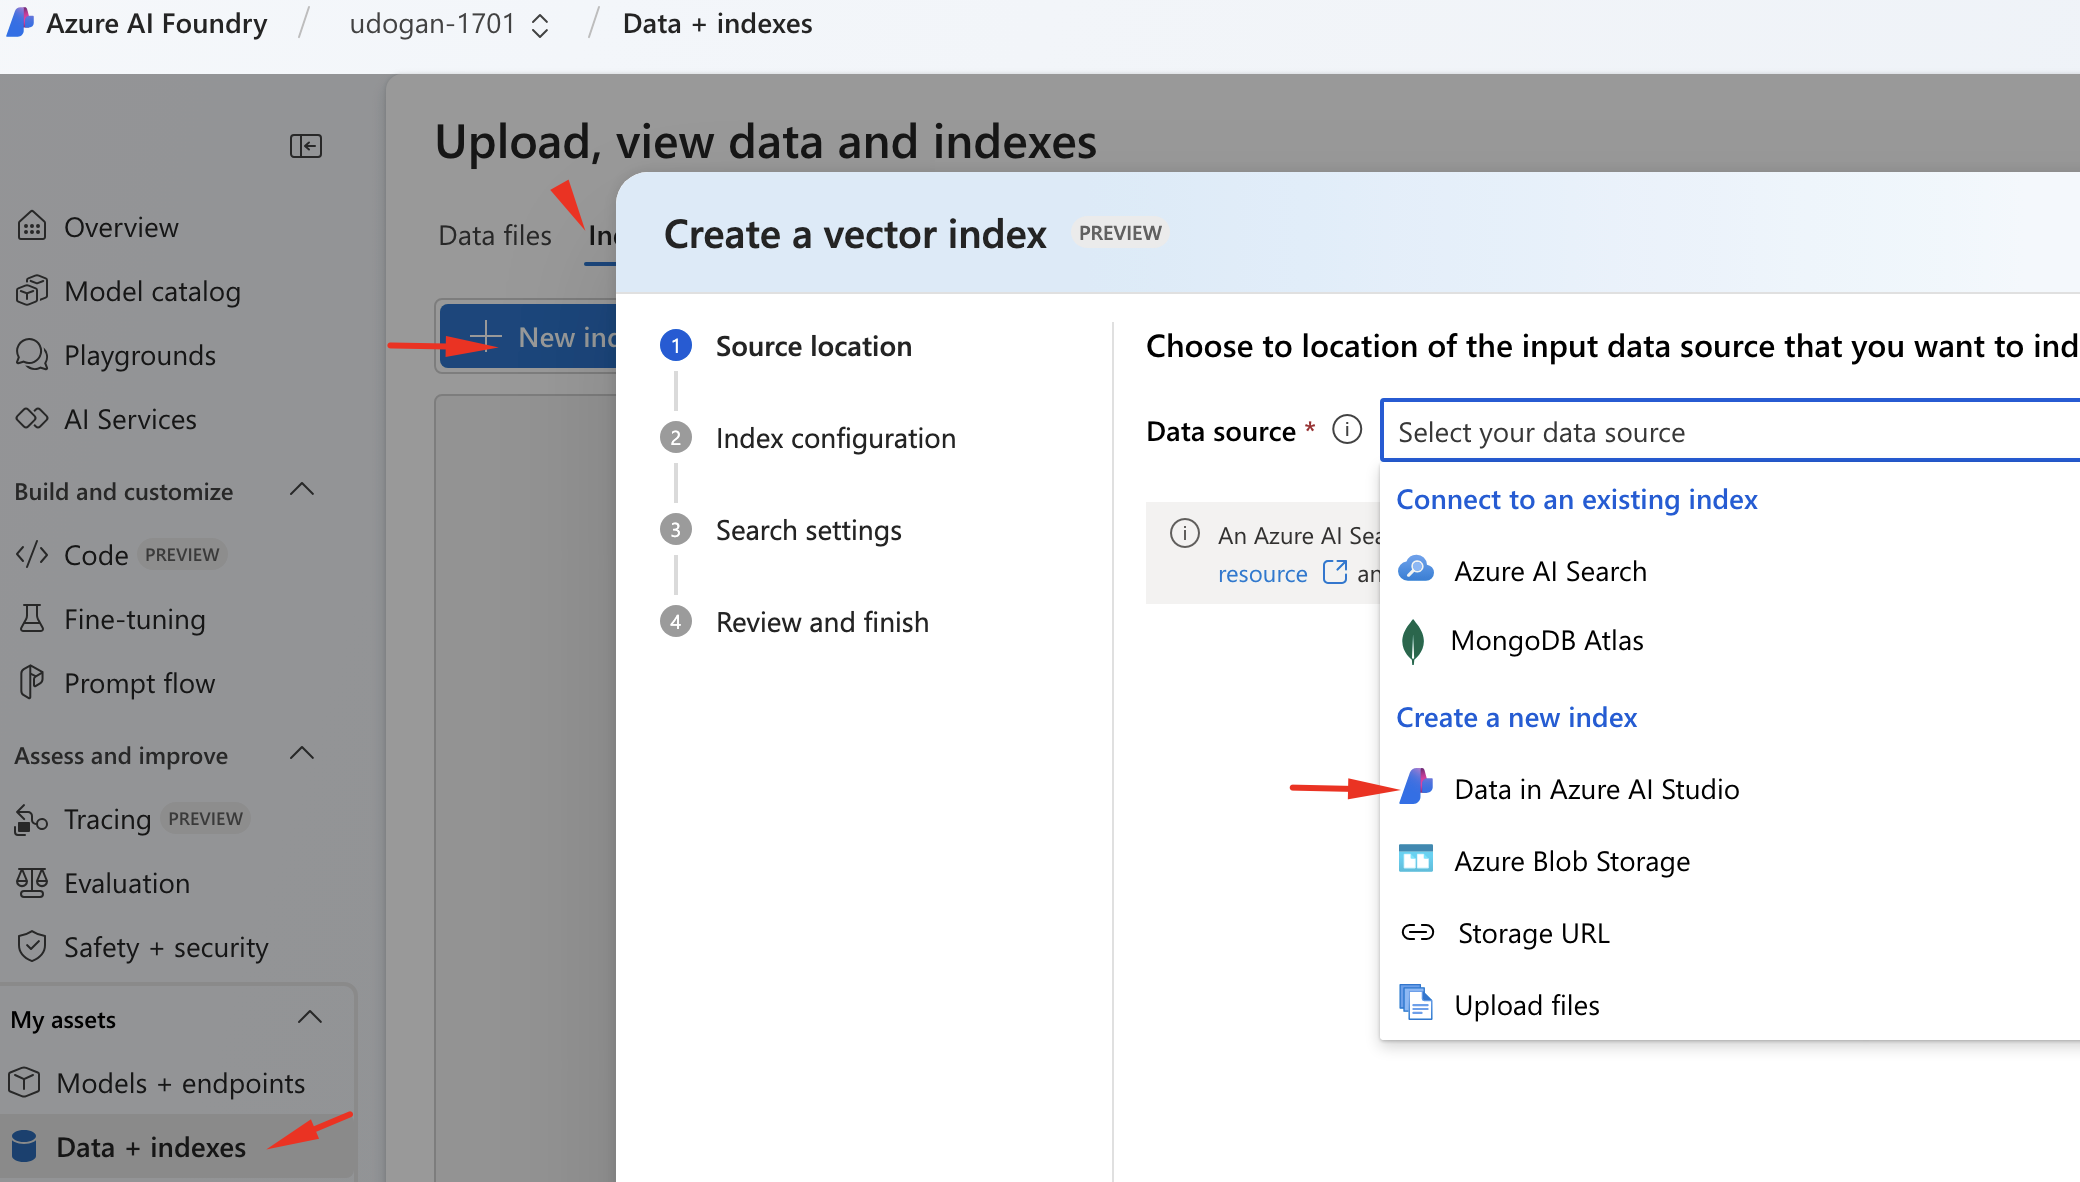
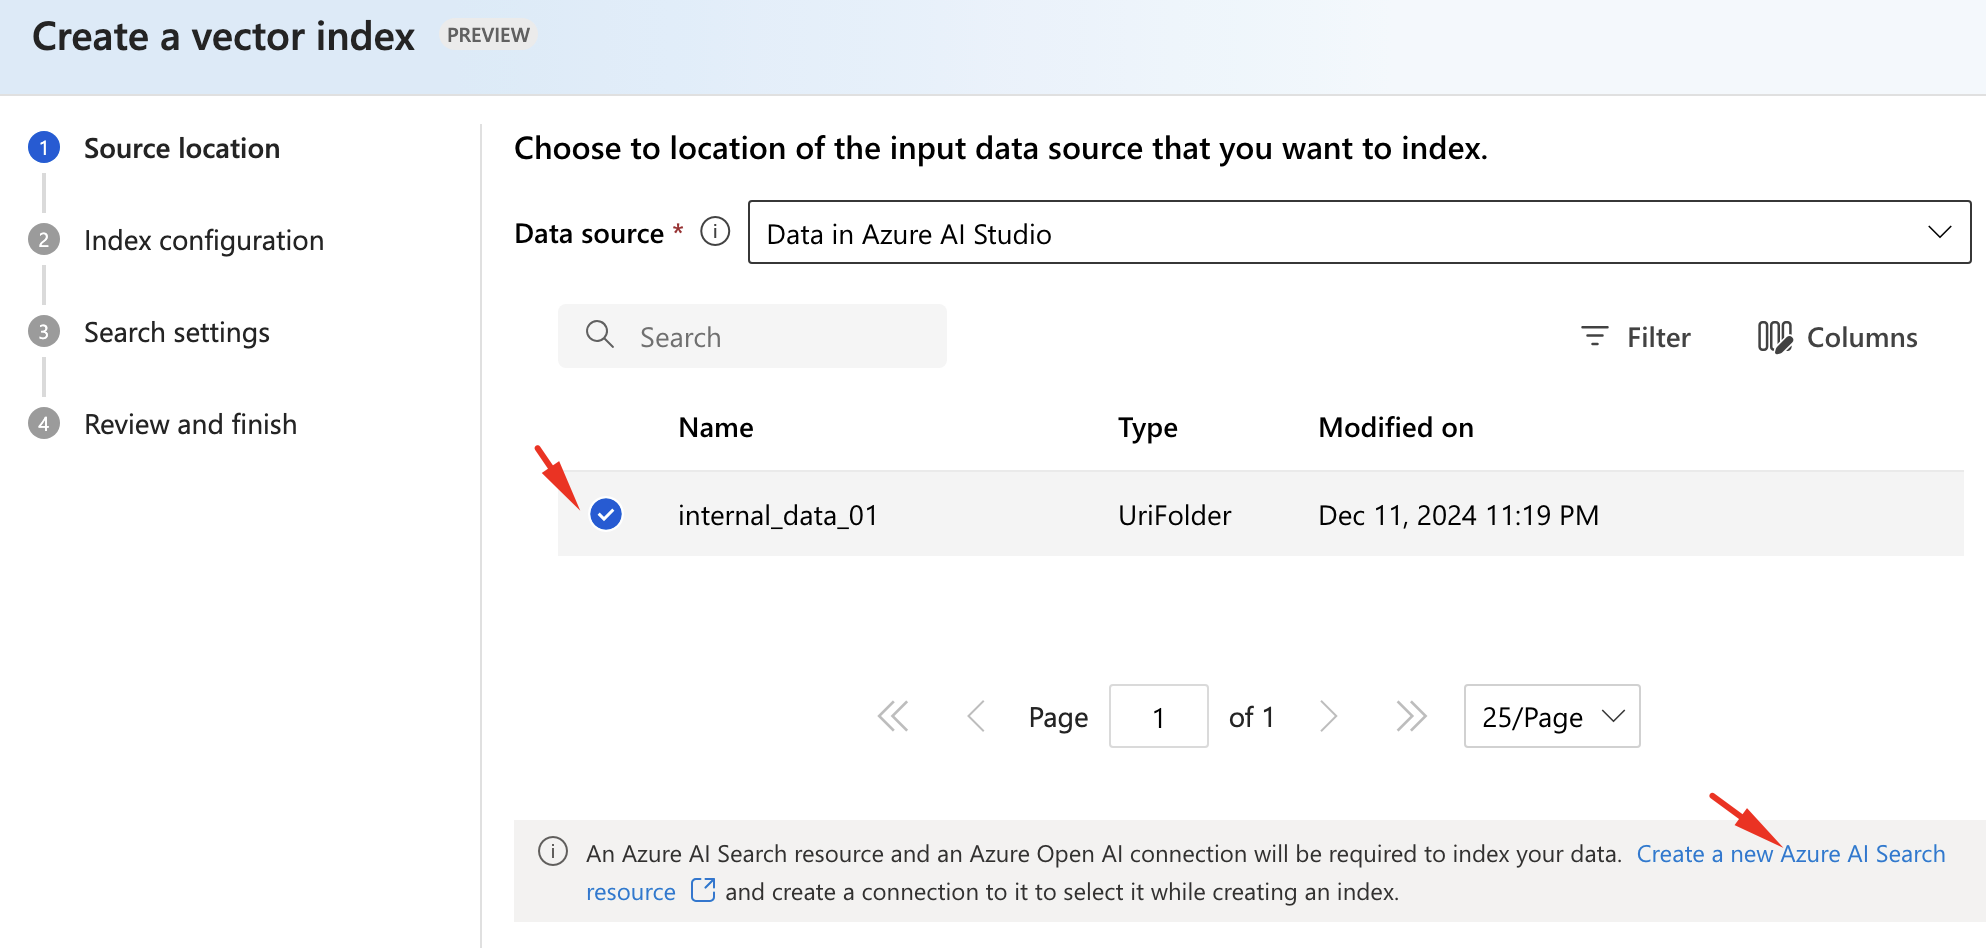
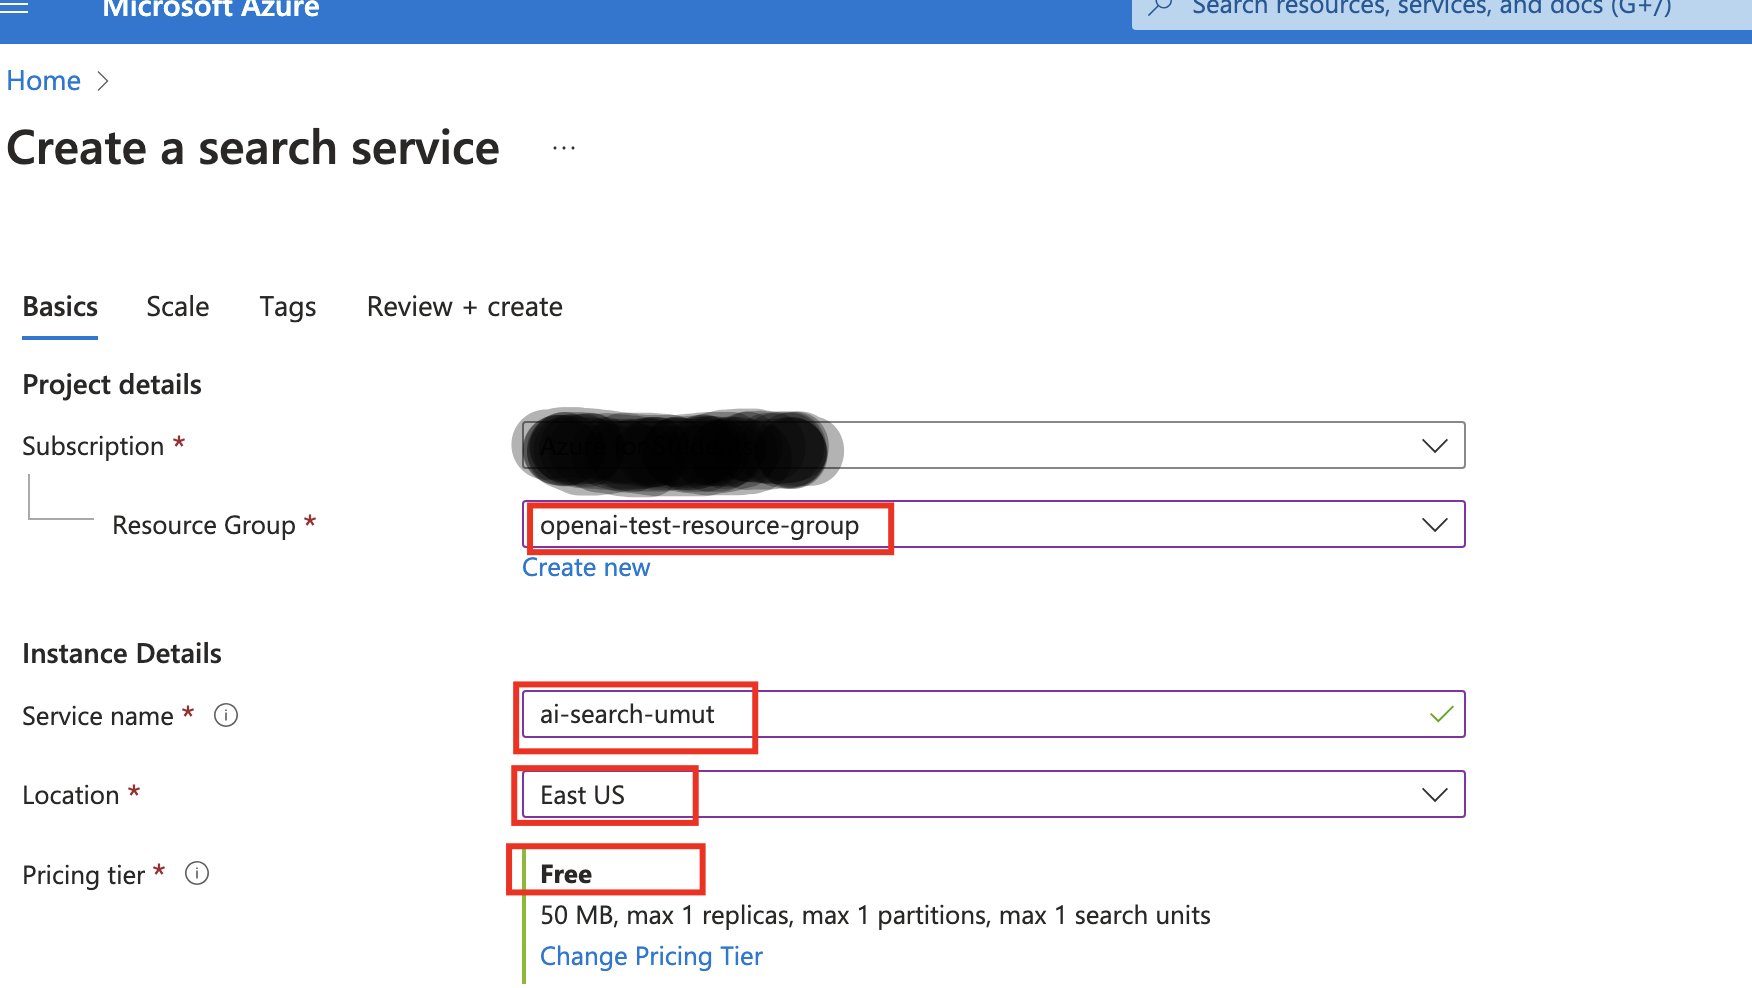
- Before clicking Next button, we need to create a new Azure AI Search resource by clicking the link in the screen as shown above. Create an AI Search service by providing following options and clicking Review + create and then Create buttons.
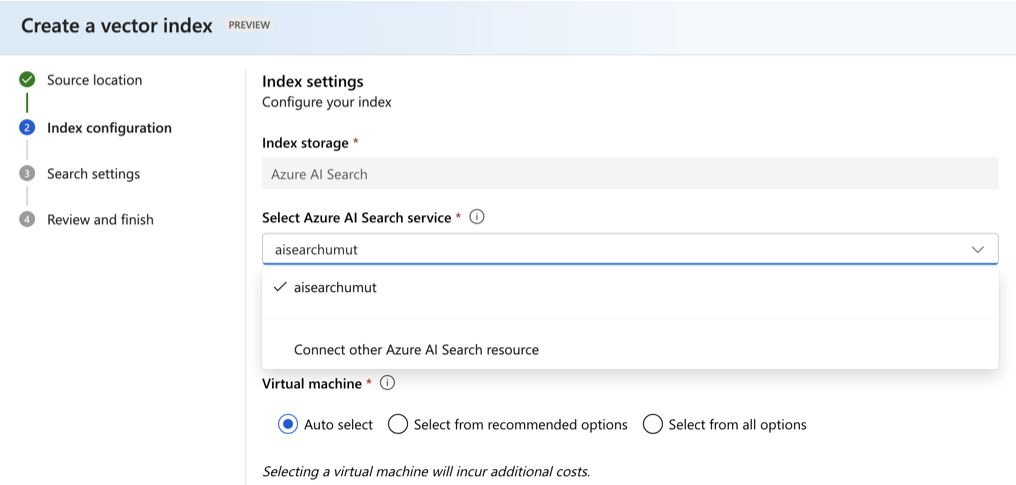
- Now go back to the index creation screen and click Next button, select Connect other AI search resource and select the newly created resource by clicking the Add connection button. Now we can select the search resource we created in the next screen. Keep the default name for the vector index. Select default options for others and click Create vector index button.
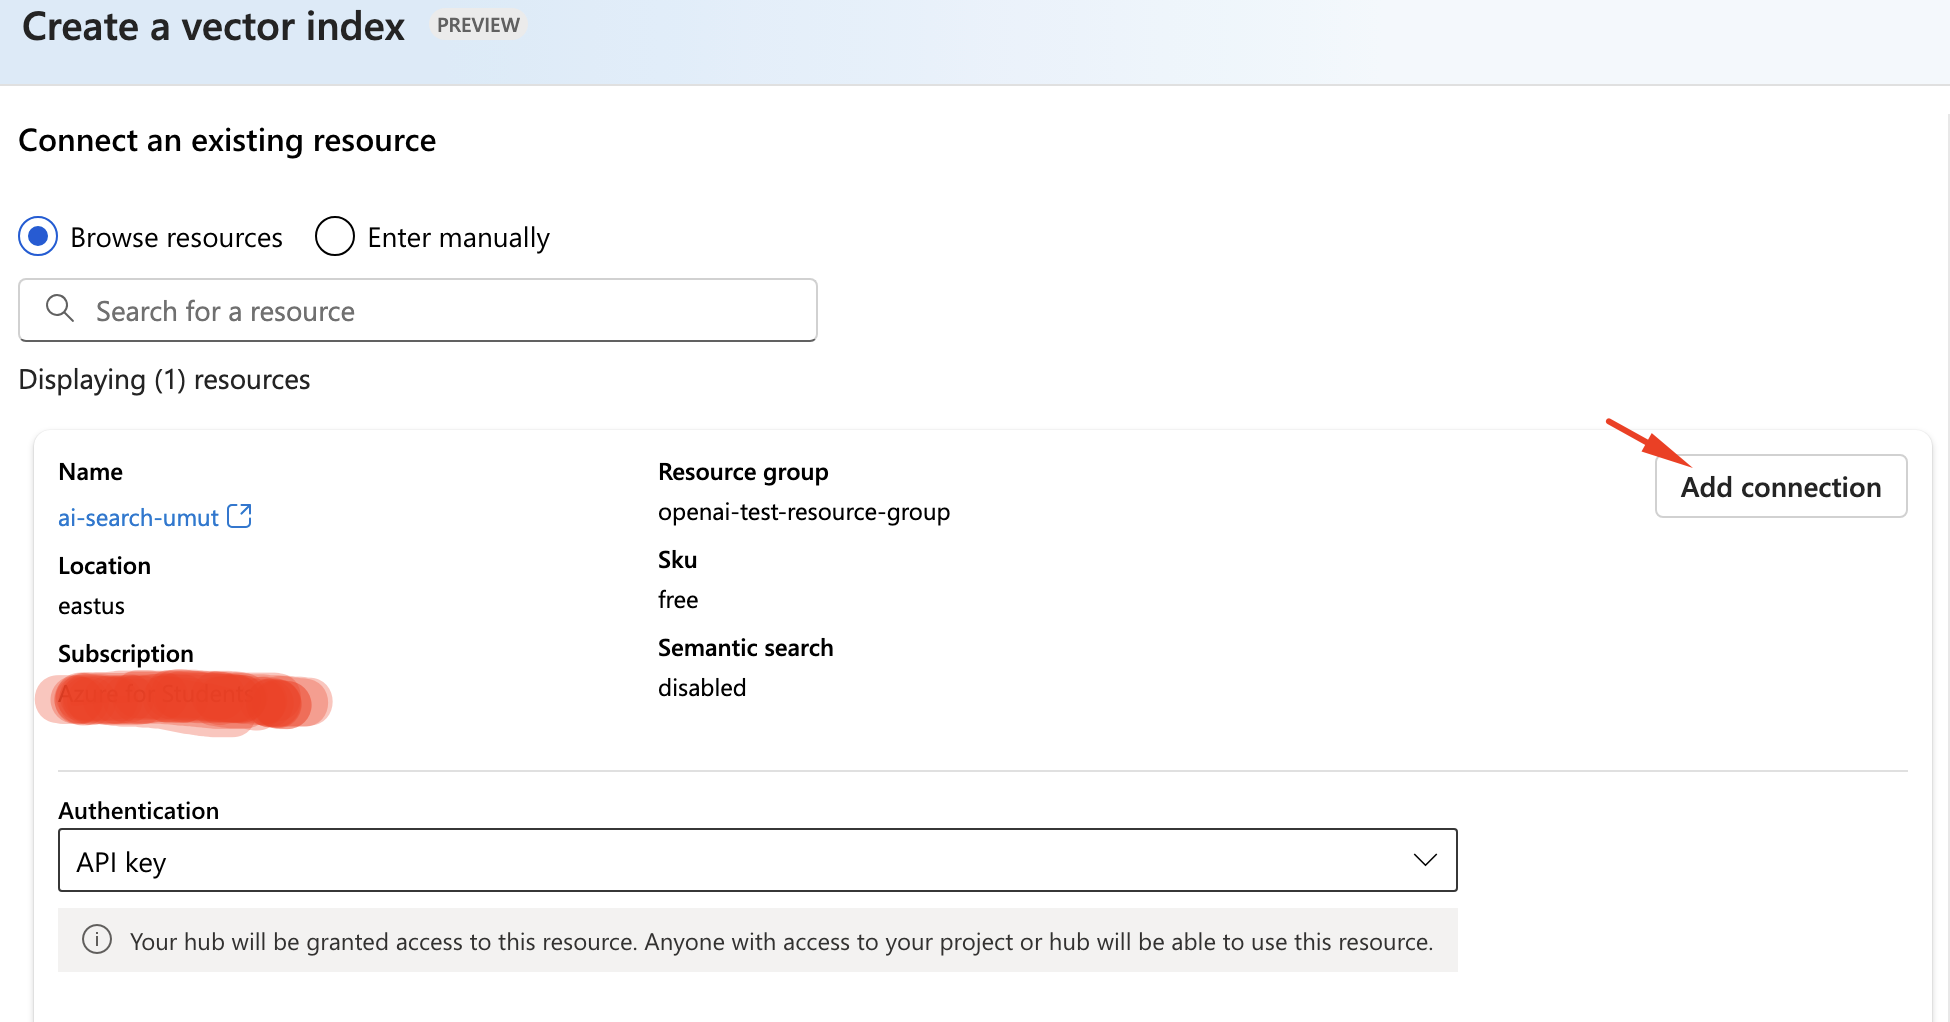
- It will take some time to indexes to be completed.
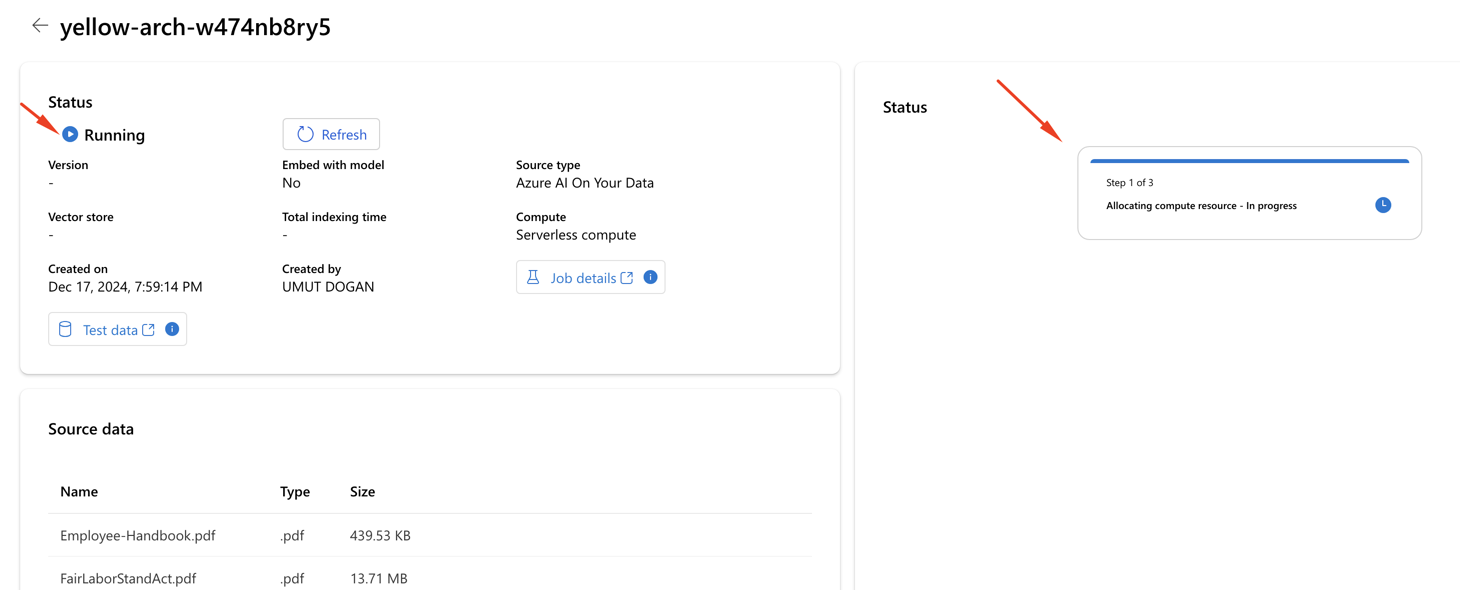
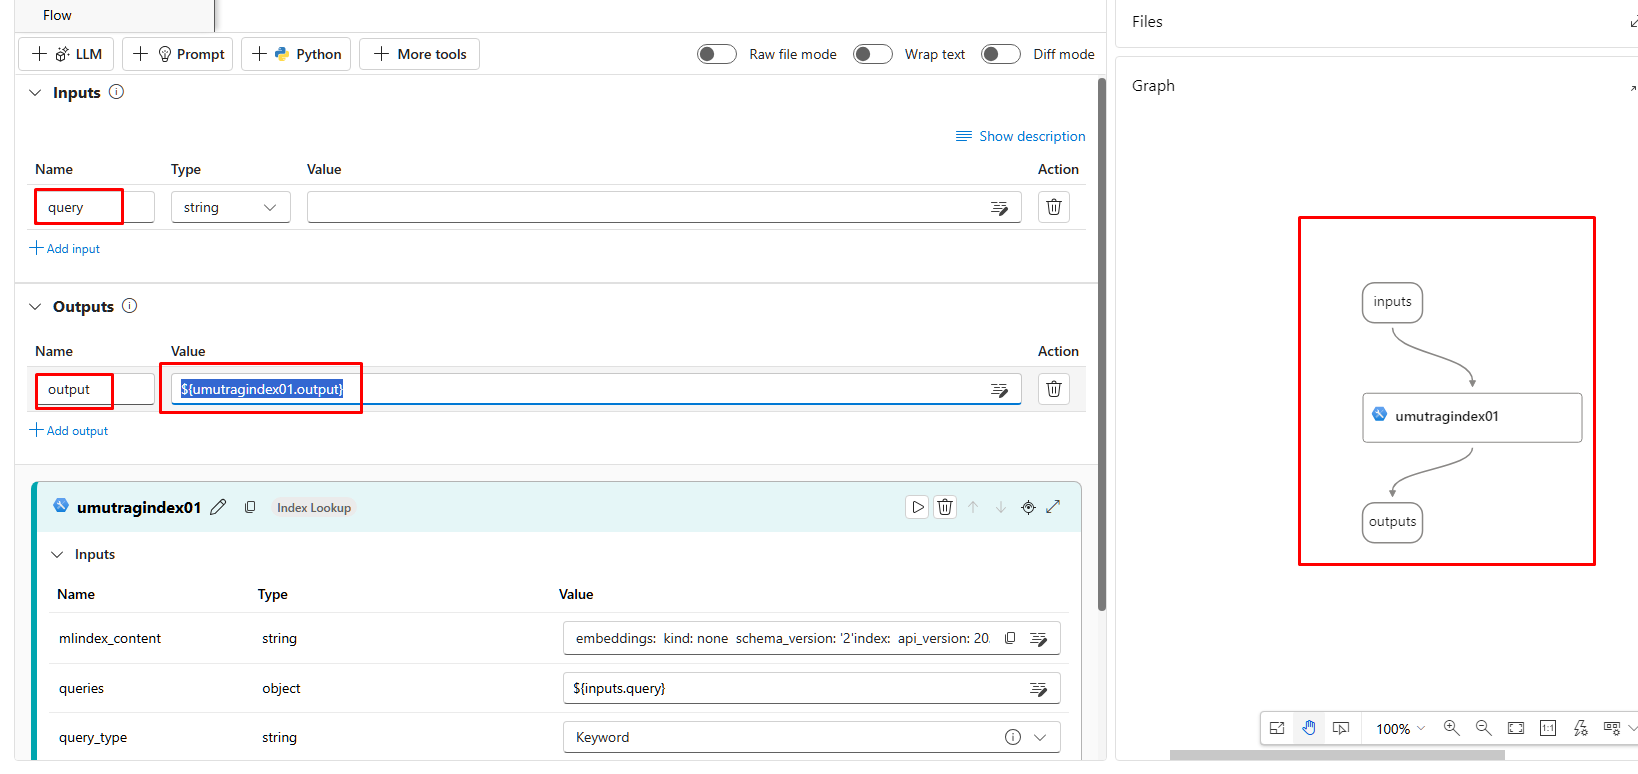
- Now, go back to prompt flow that we generated and click + More tools button. Select Index Lookup item. Give it a name and click Add button.
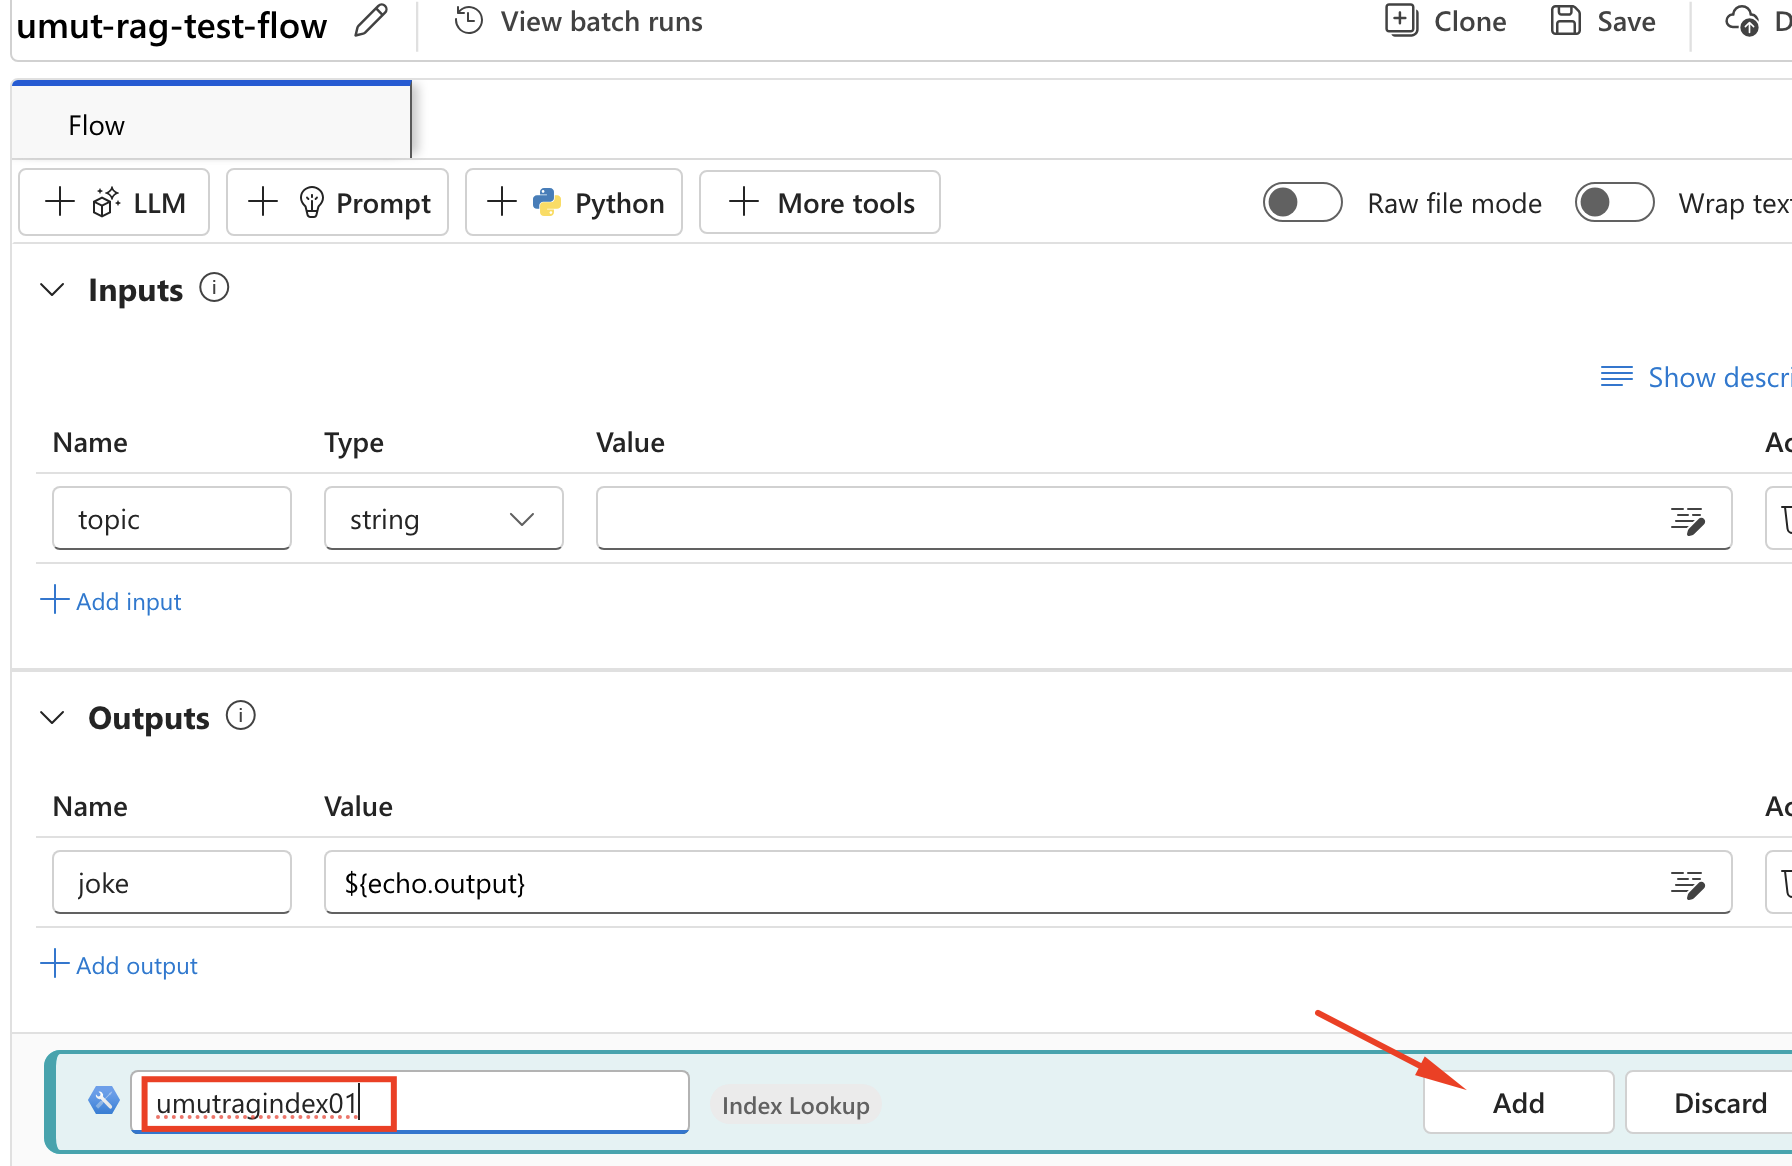
- Select mlindex_content and it will open a popup fill the options like in below screens and Save the flow:
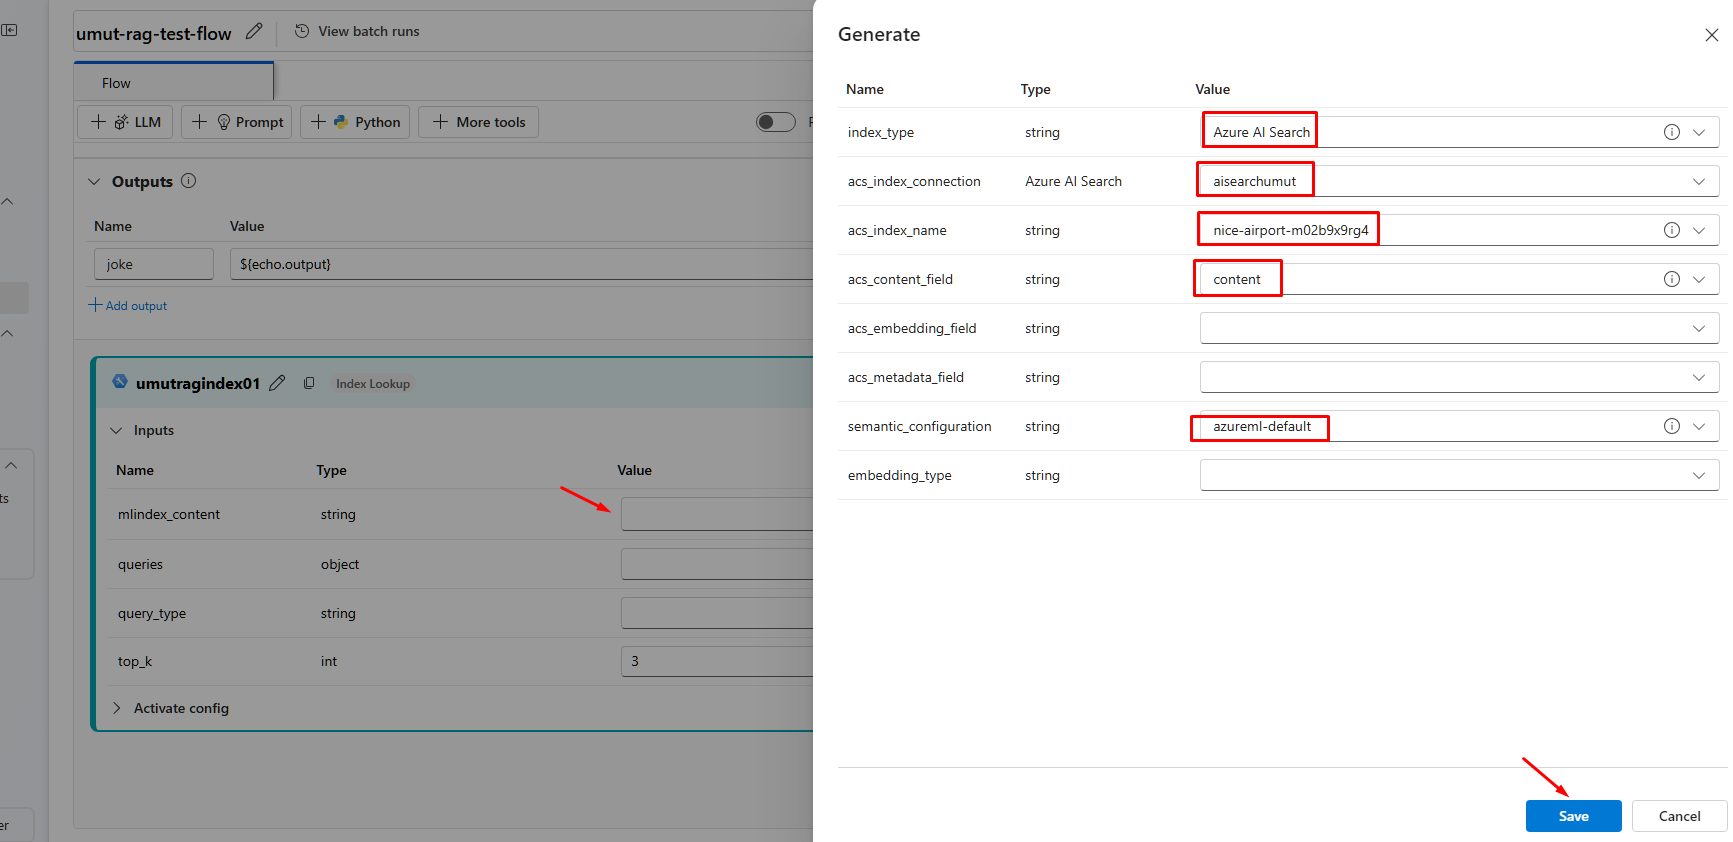
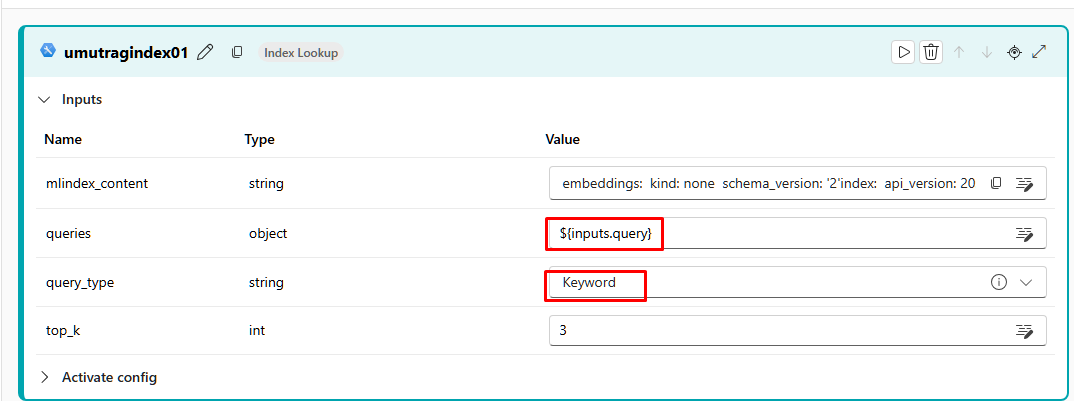
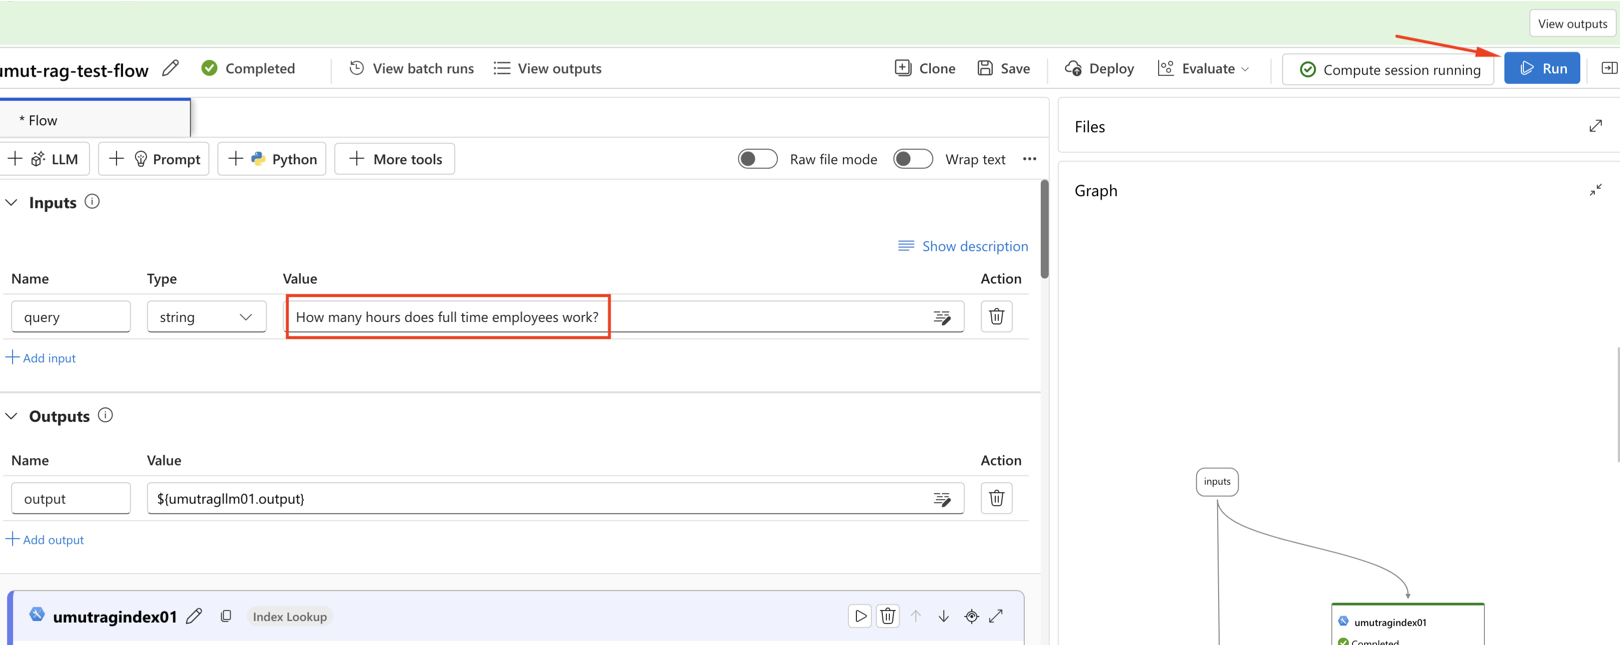
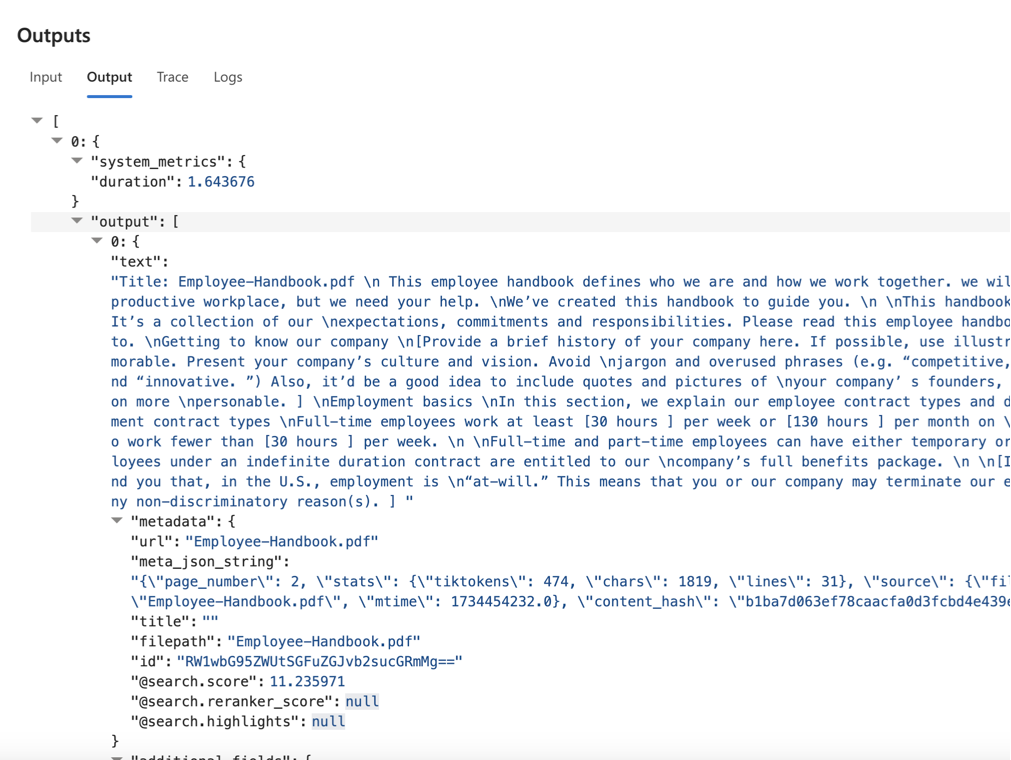
- Then ask a sample questions.
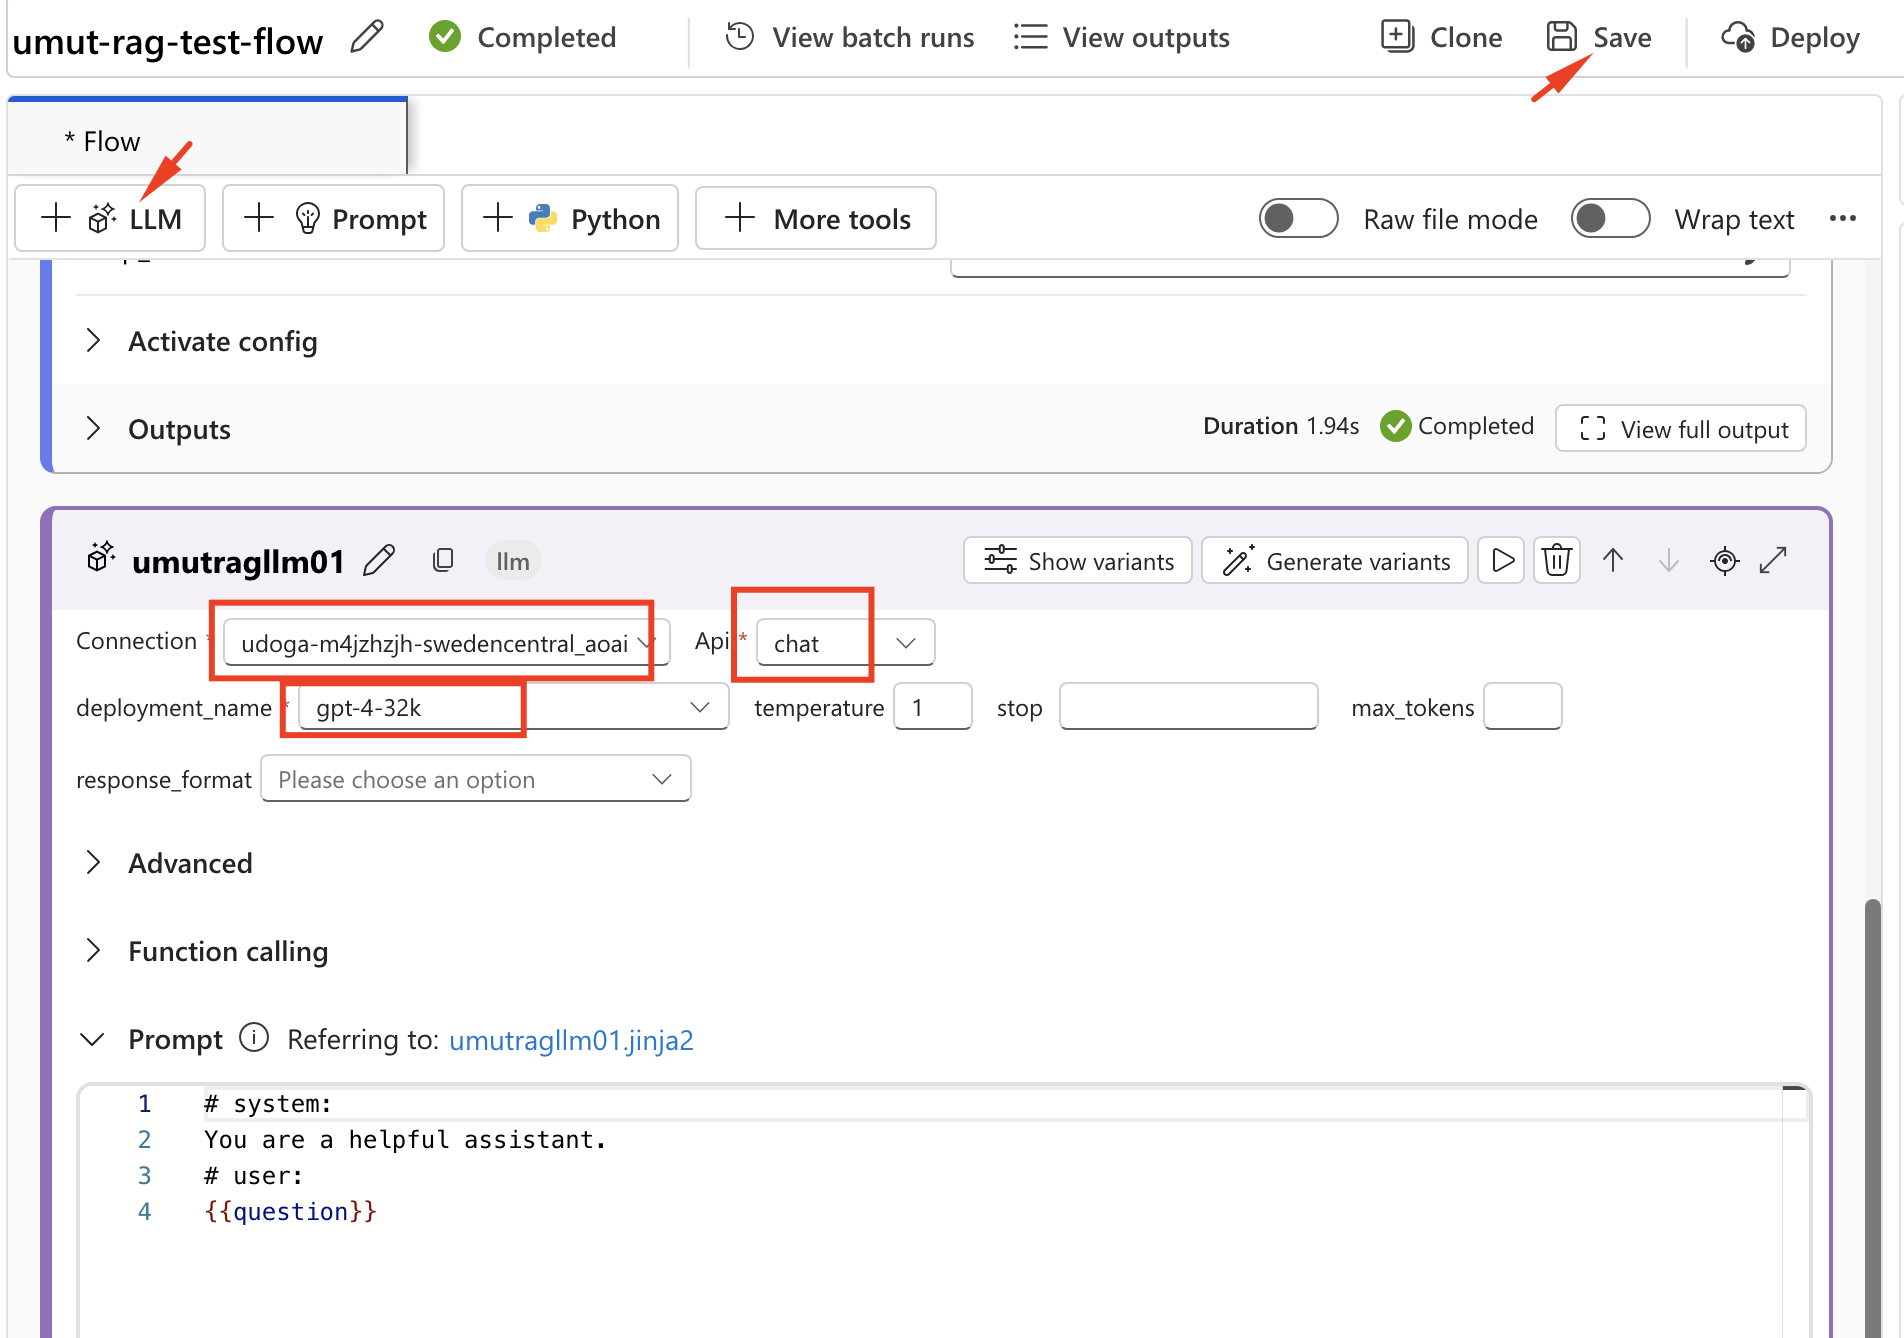
- Create an LLM by clicking + LLM button and Save it.
- Add Python
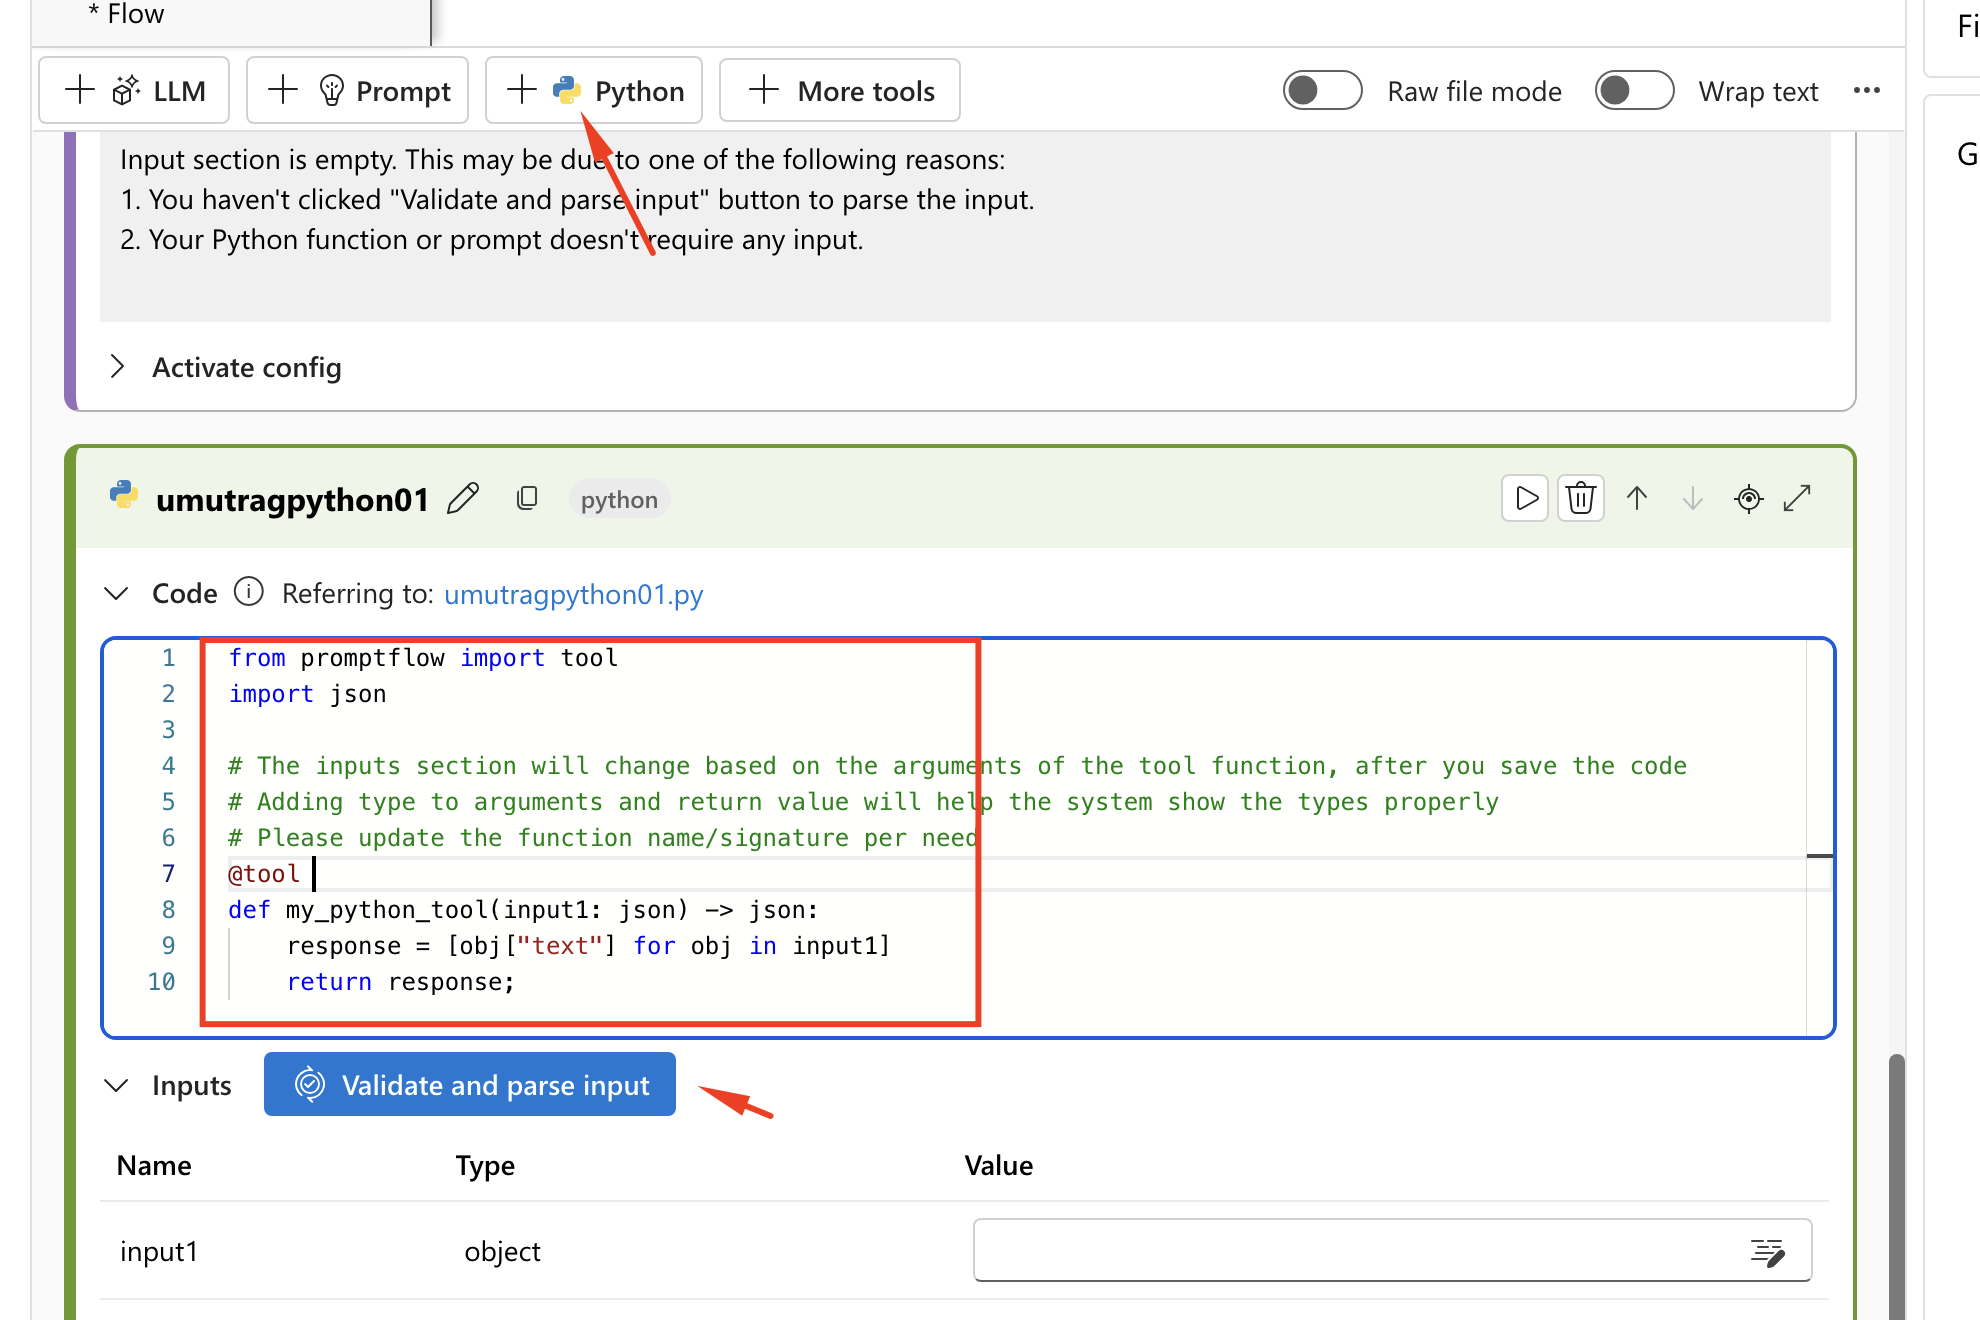
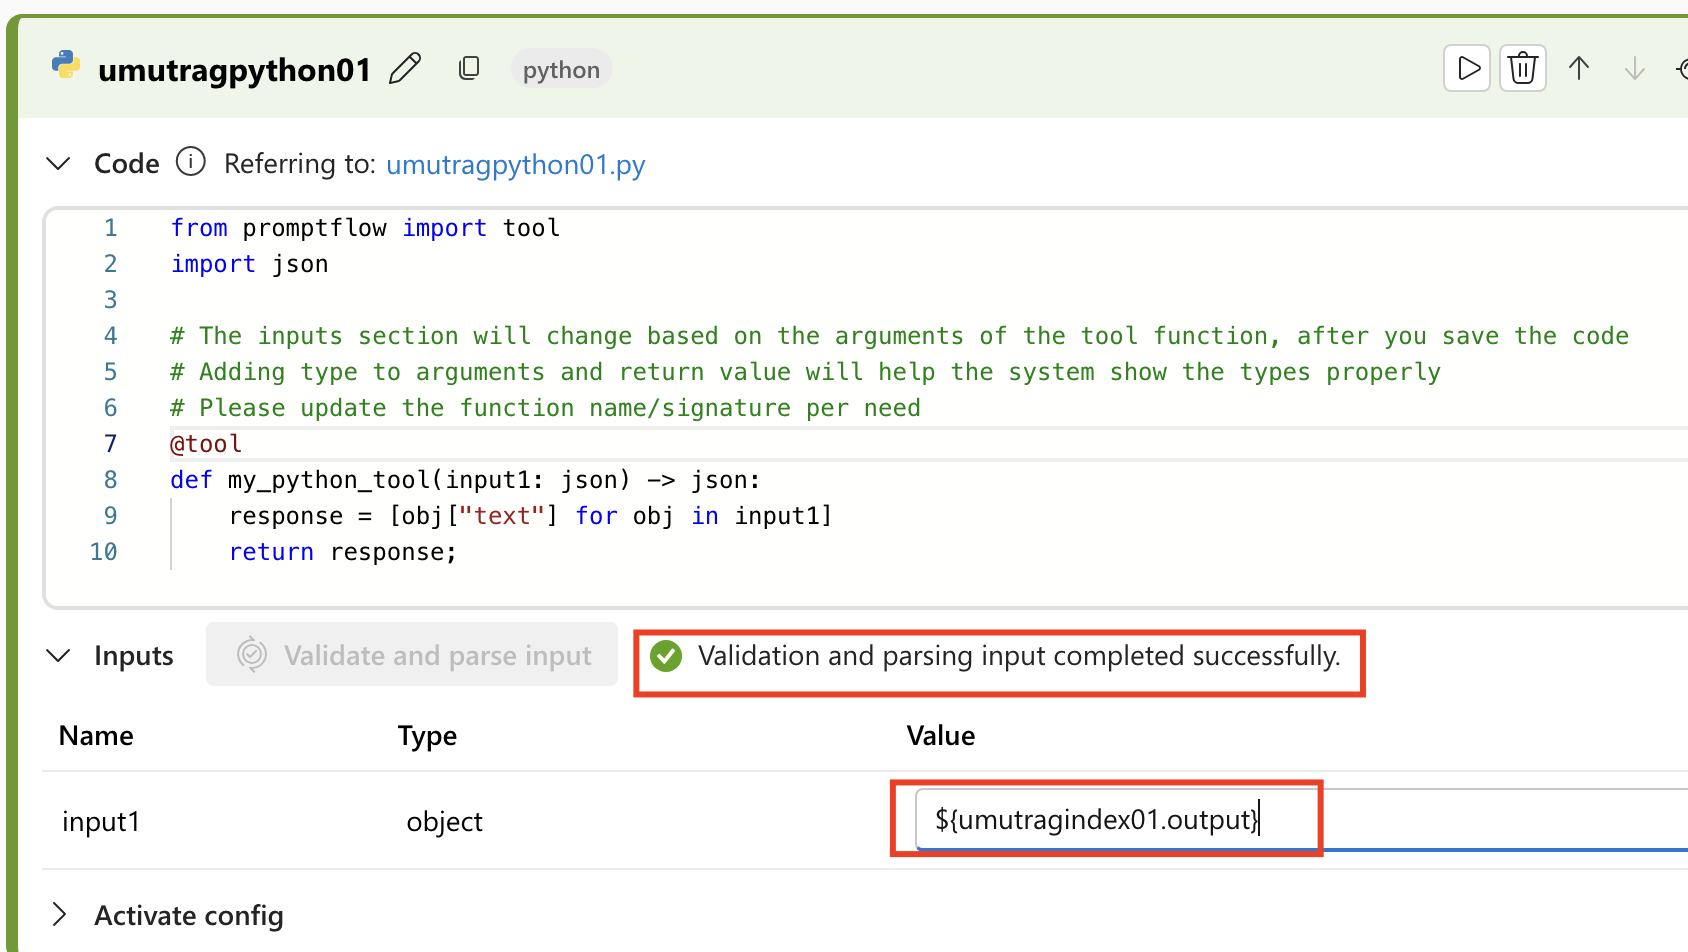
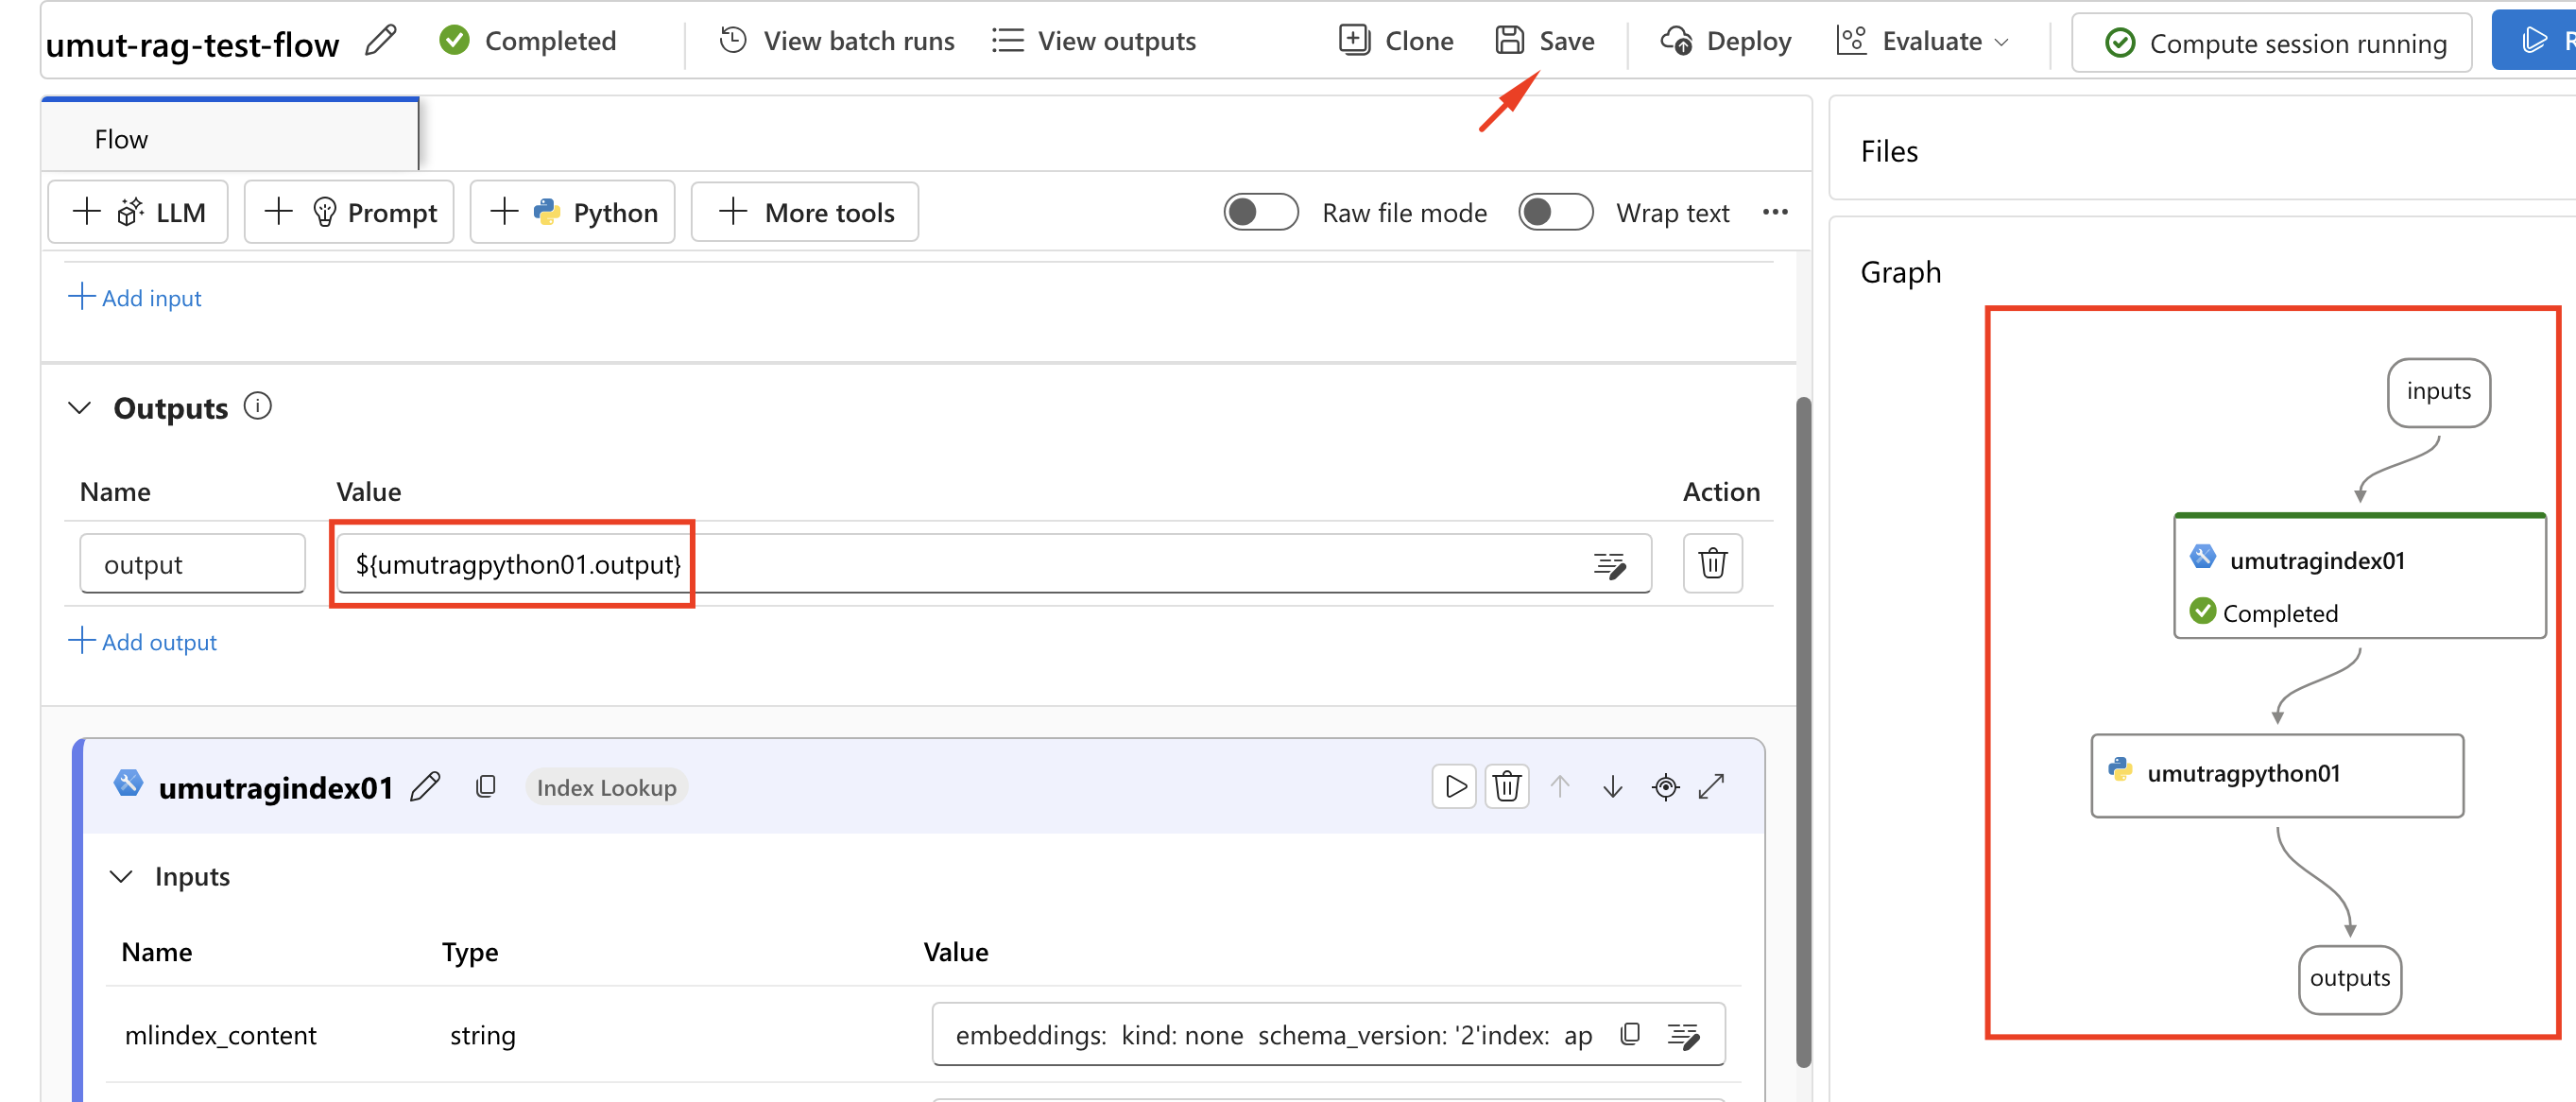
- Change output to python output, delete LLM and Save.
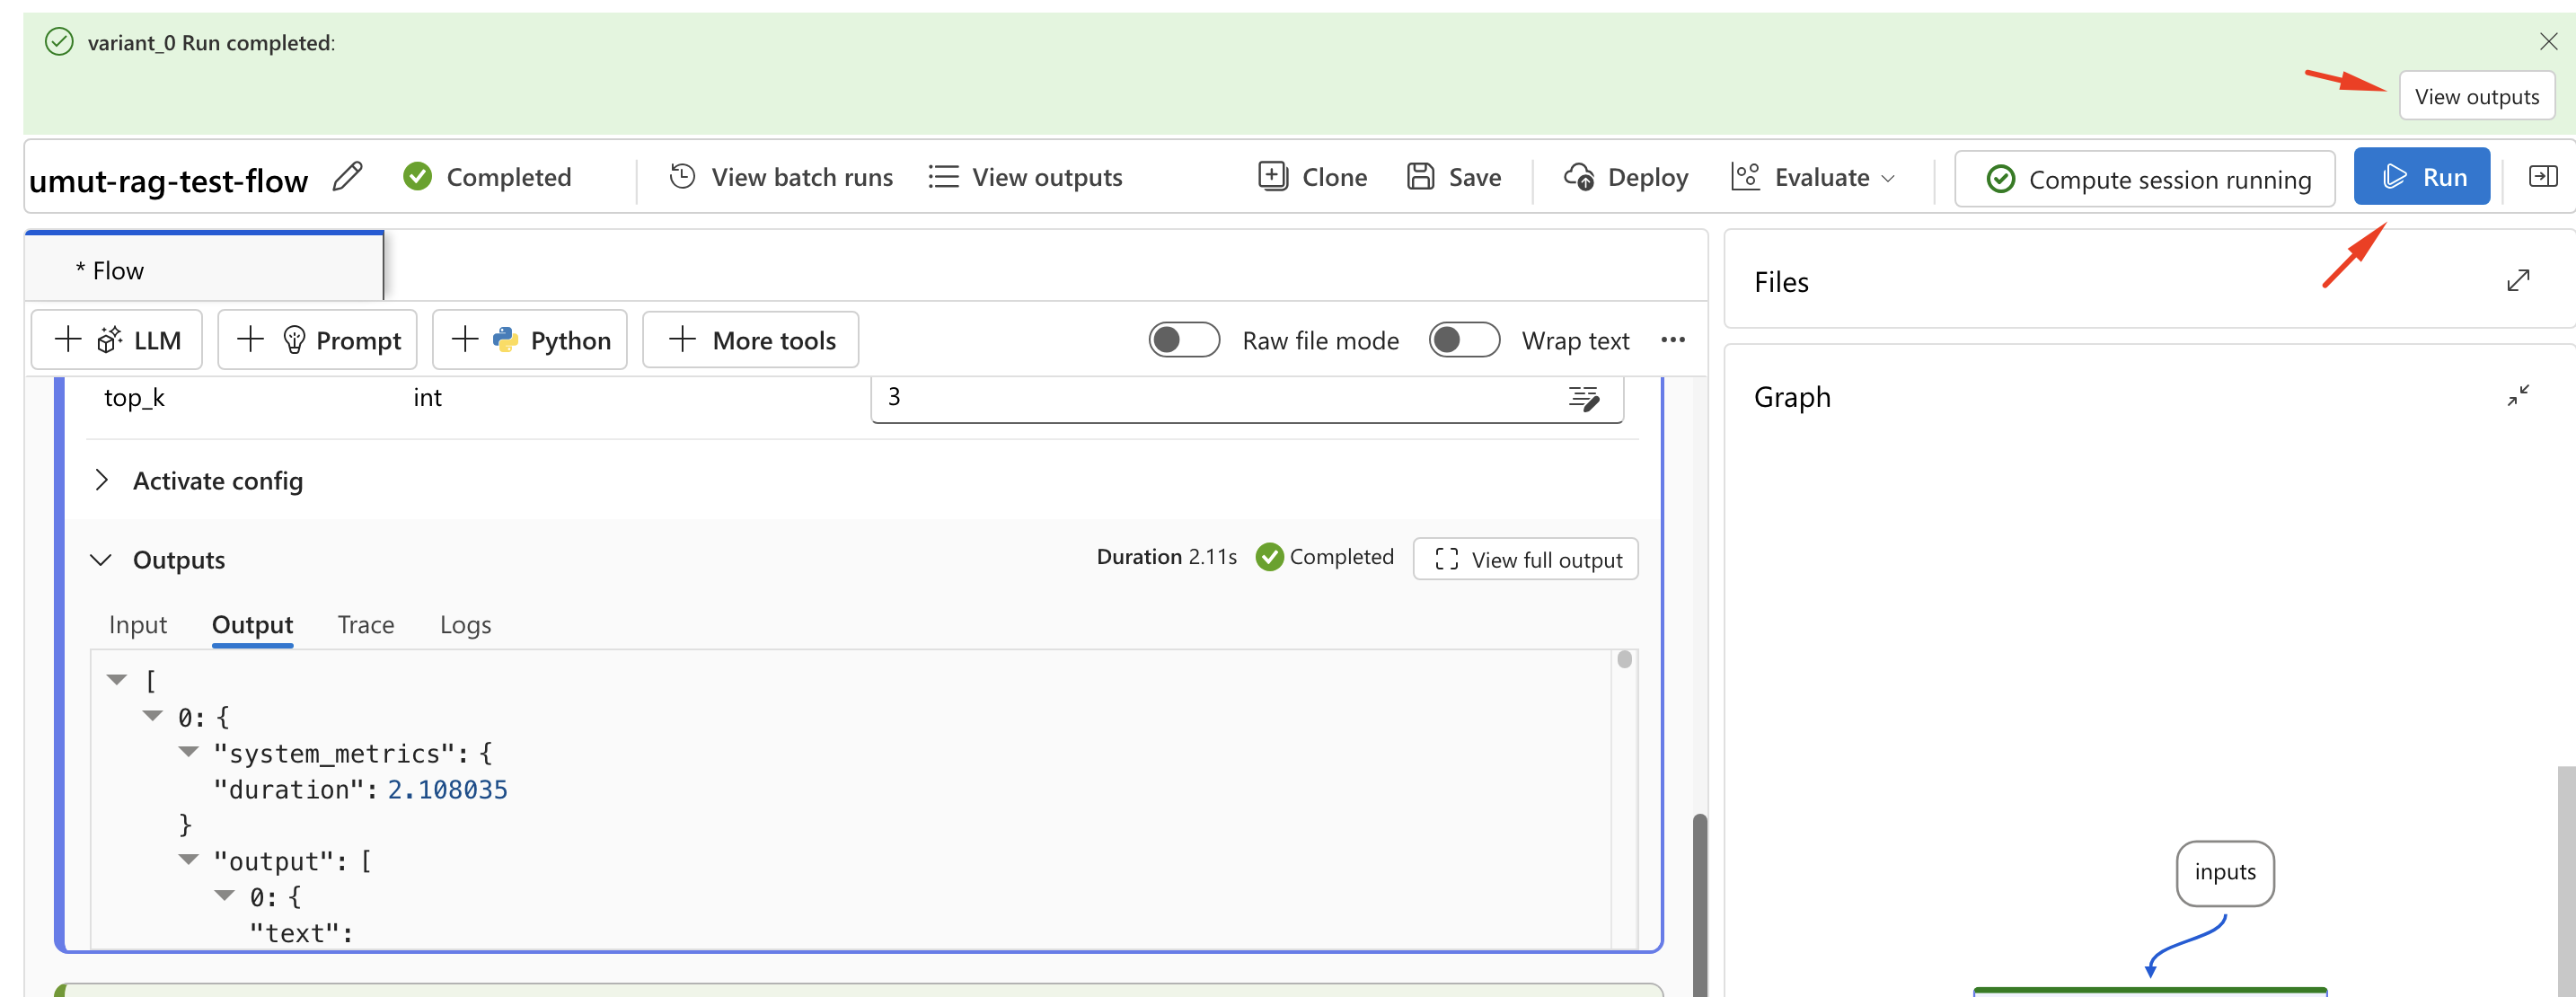
- Run again and review outputs
- Add LLM again and change the output to LLM output, Save and Run again.
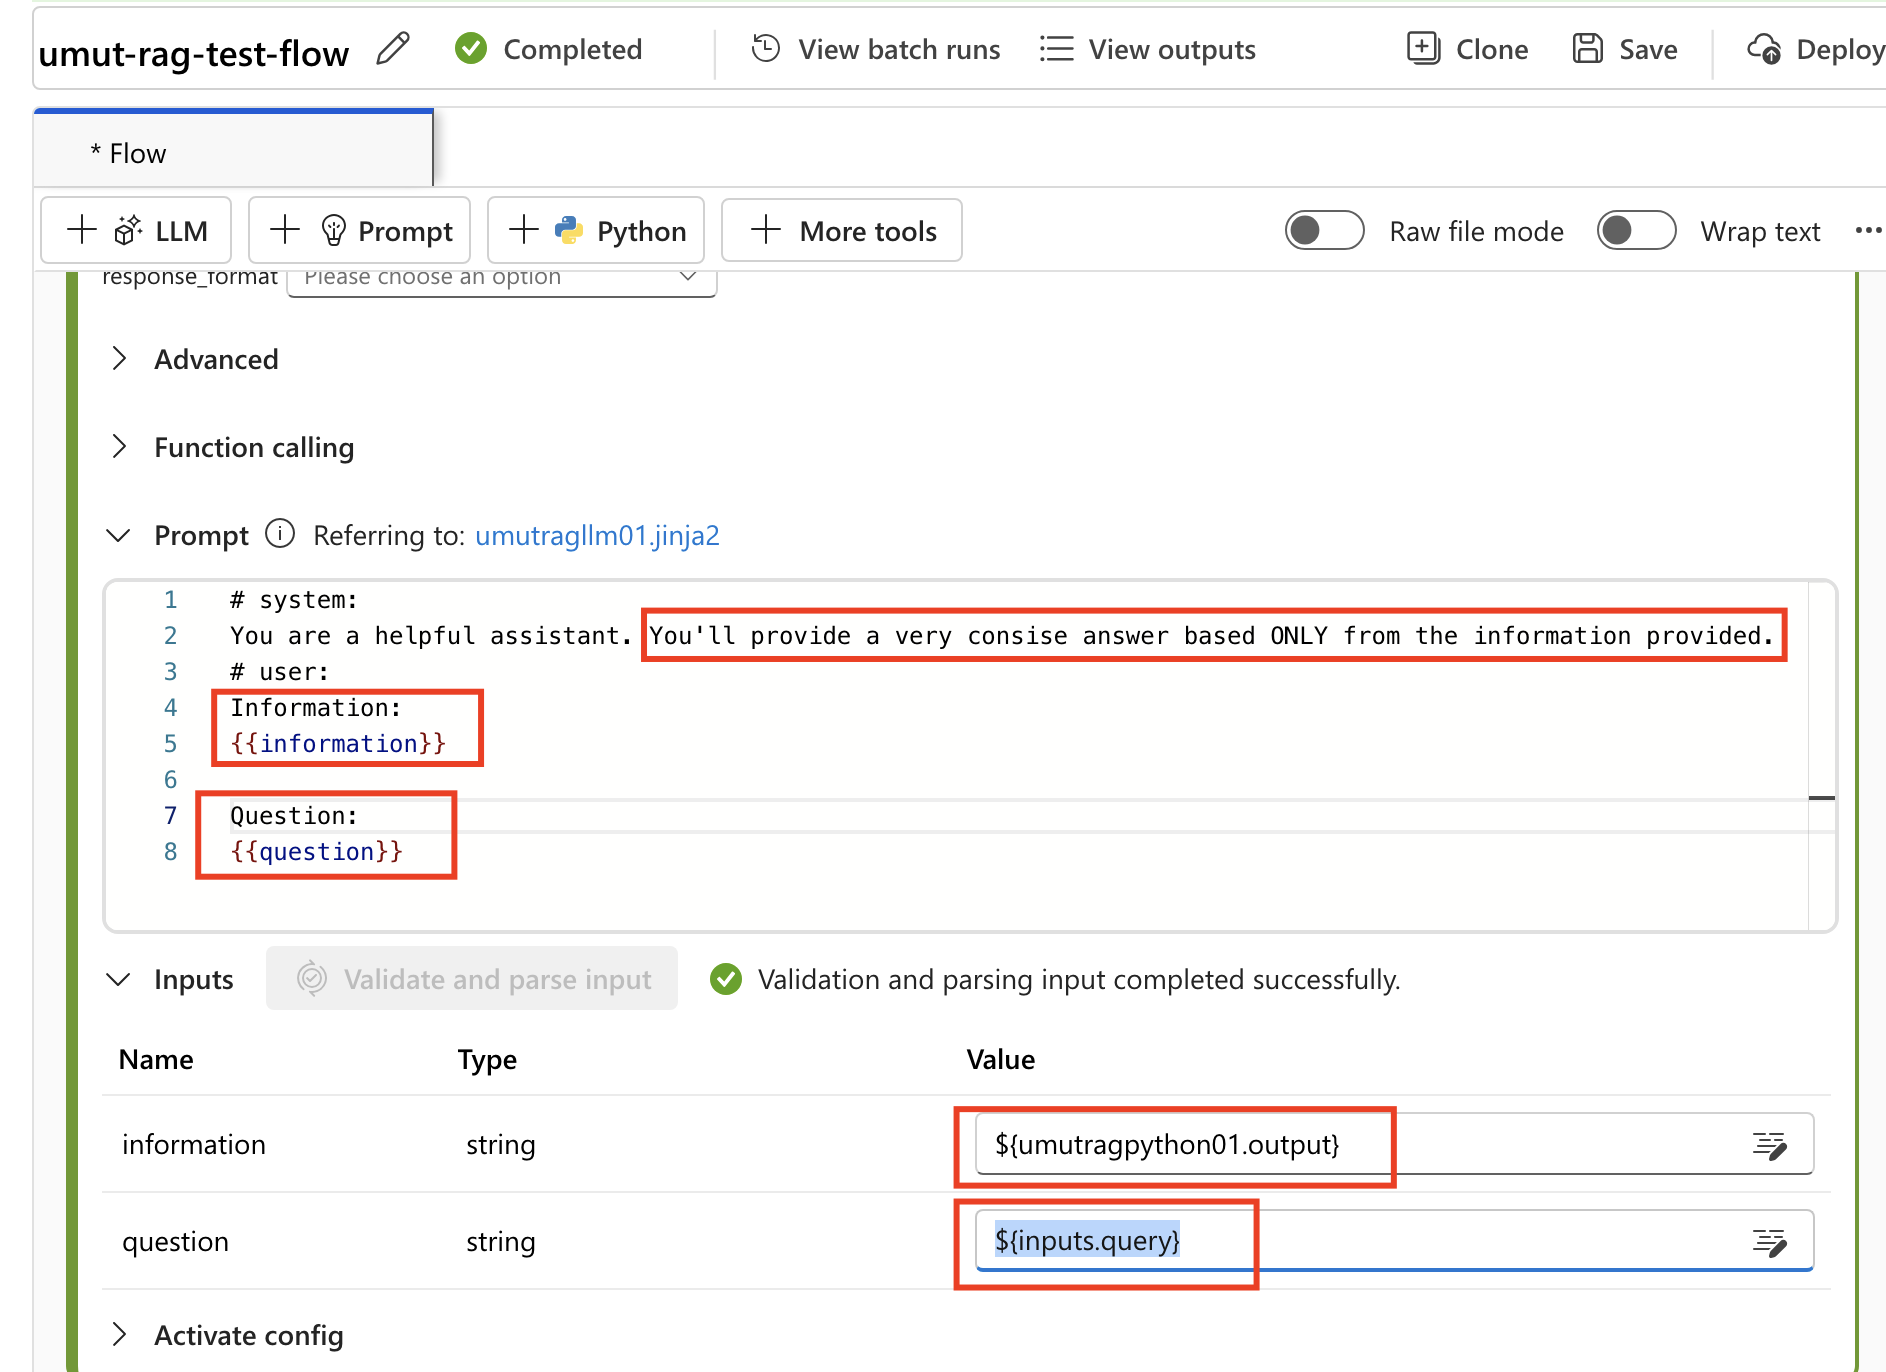
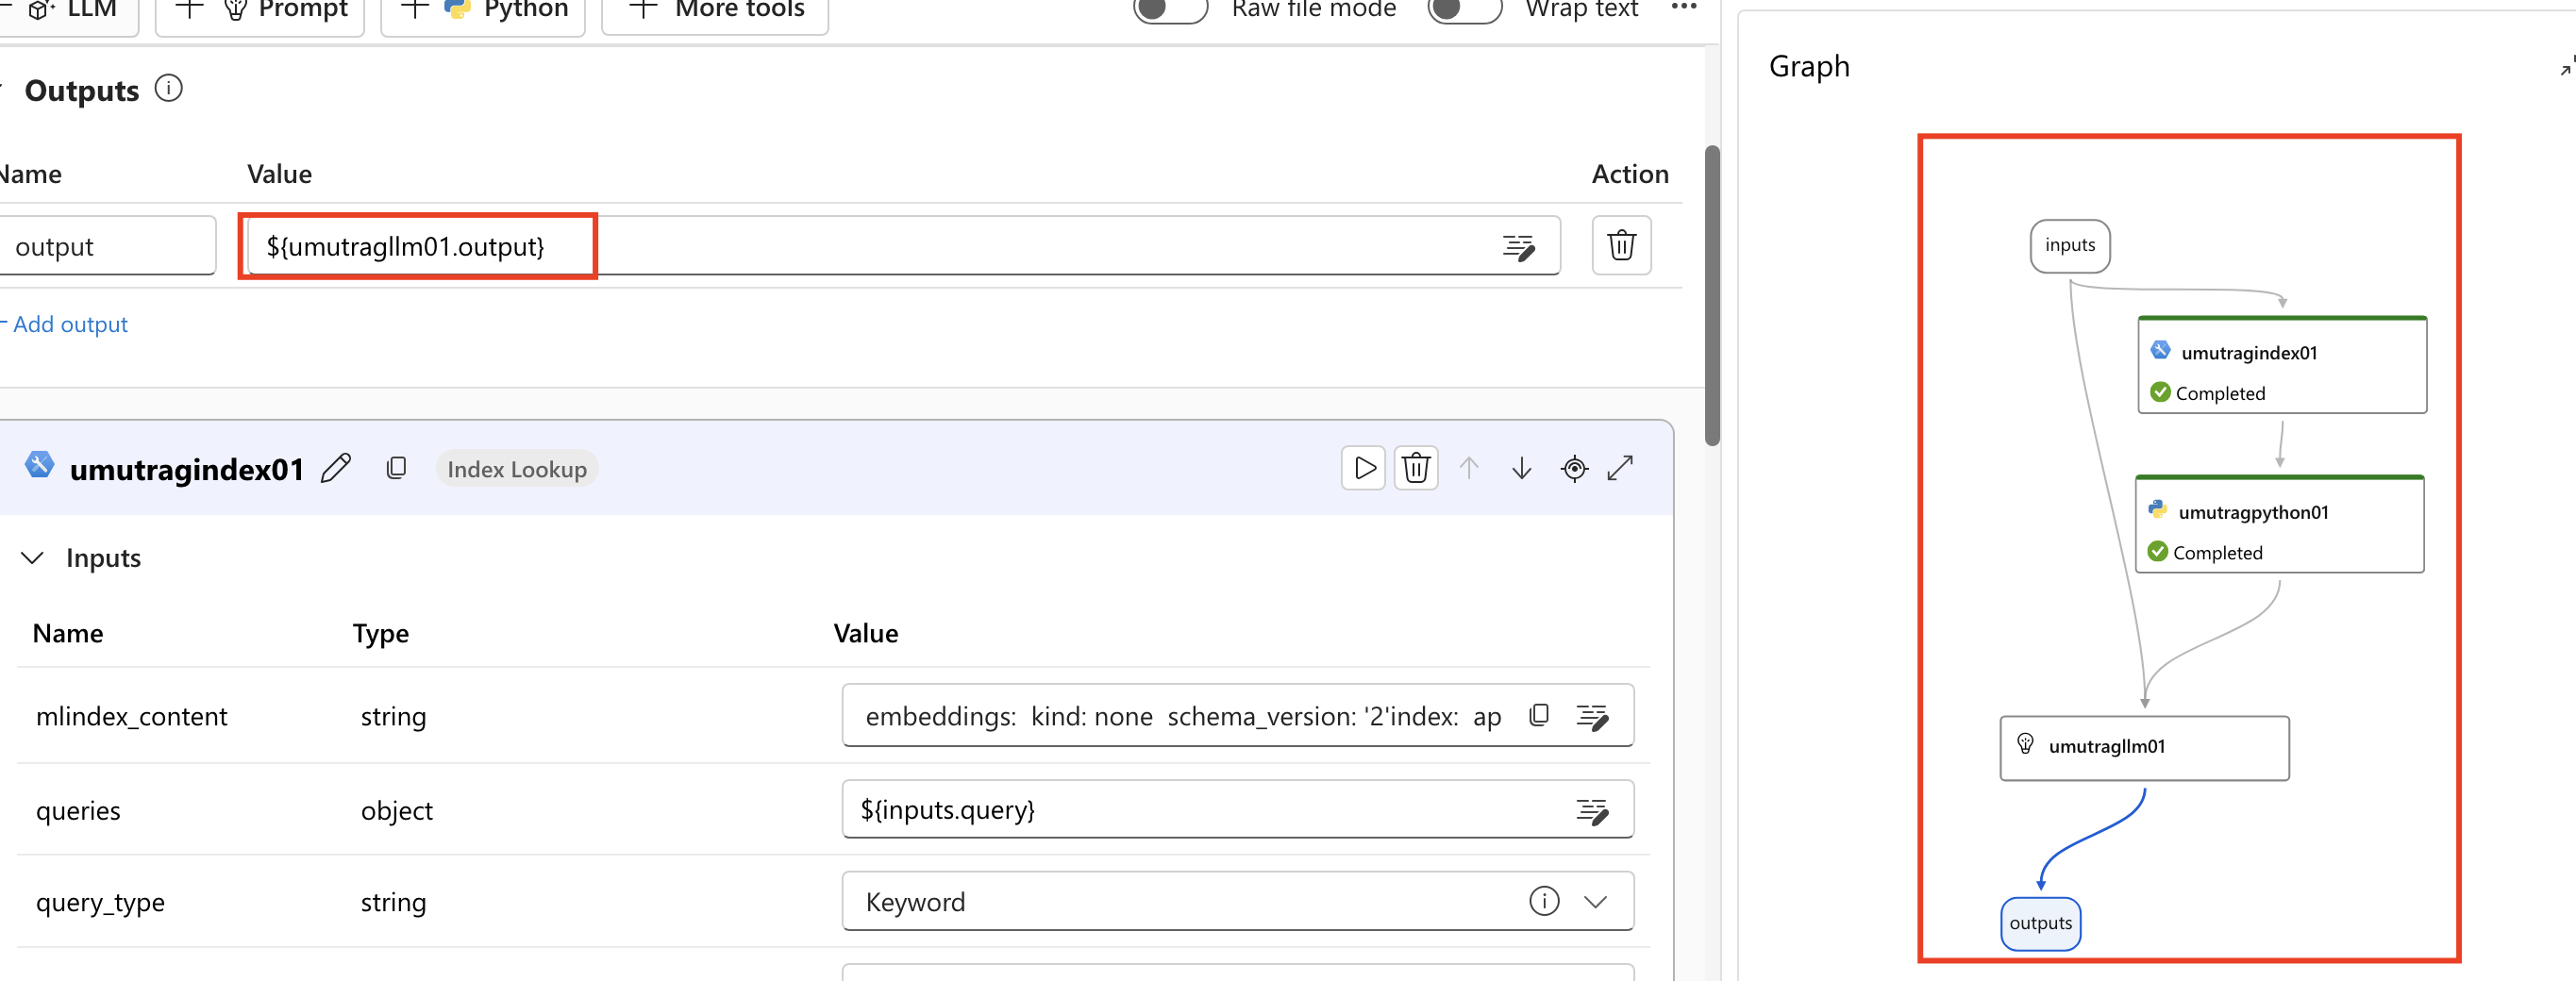
- Now, you’ll see a concise output.
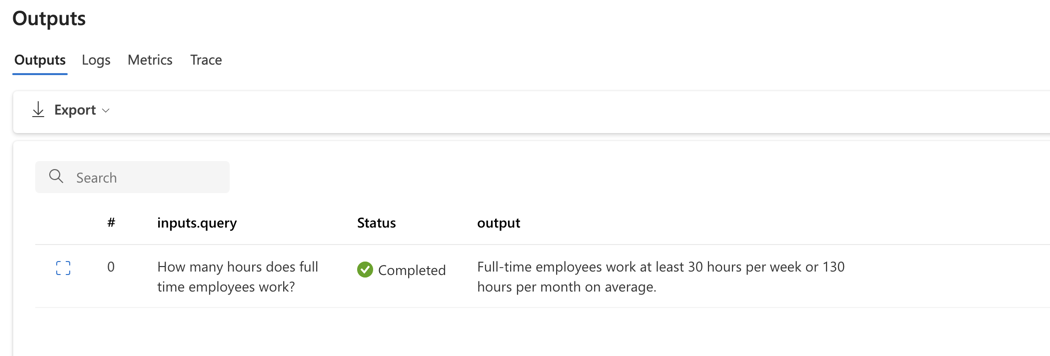
- Experiment with different questions from the document.
Deploy the Application Link to heading
- Click Deploy button. select default values and click Create button.
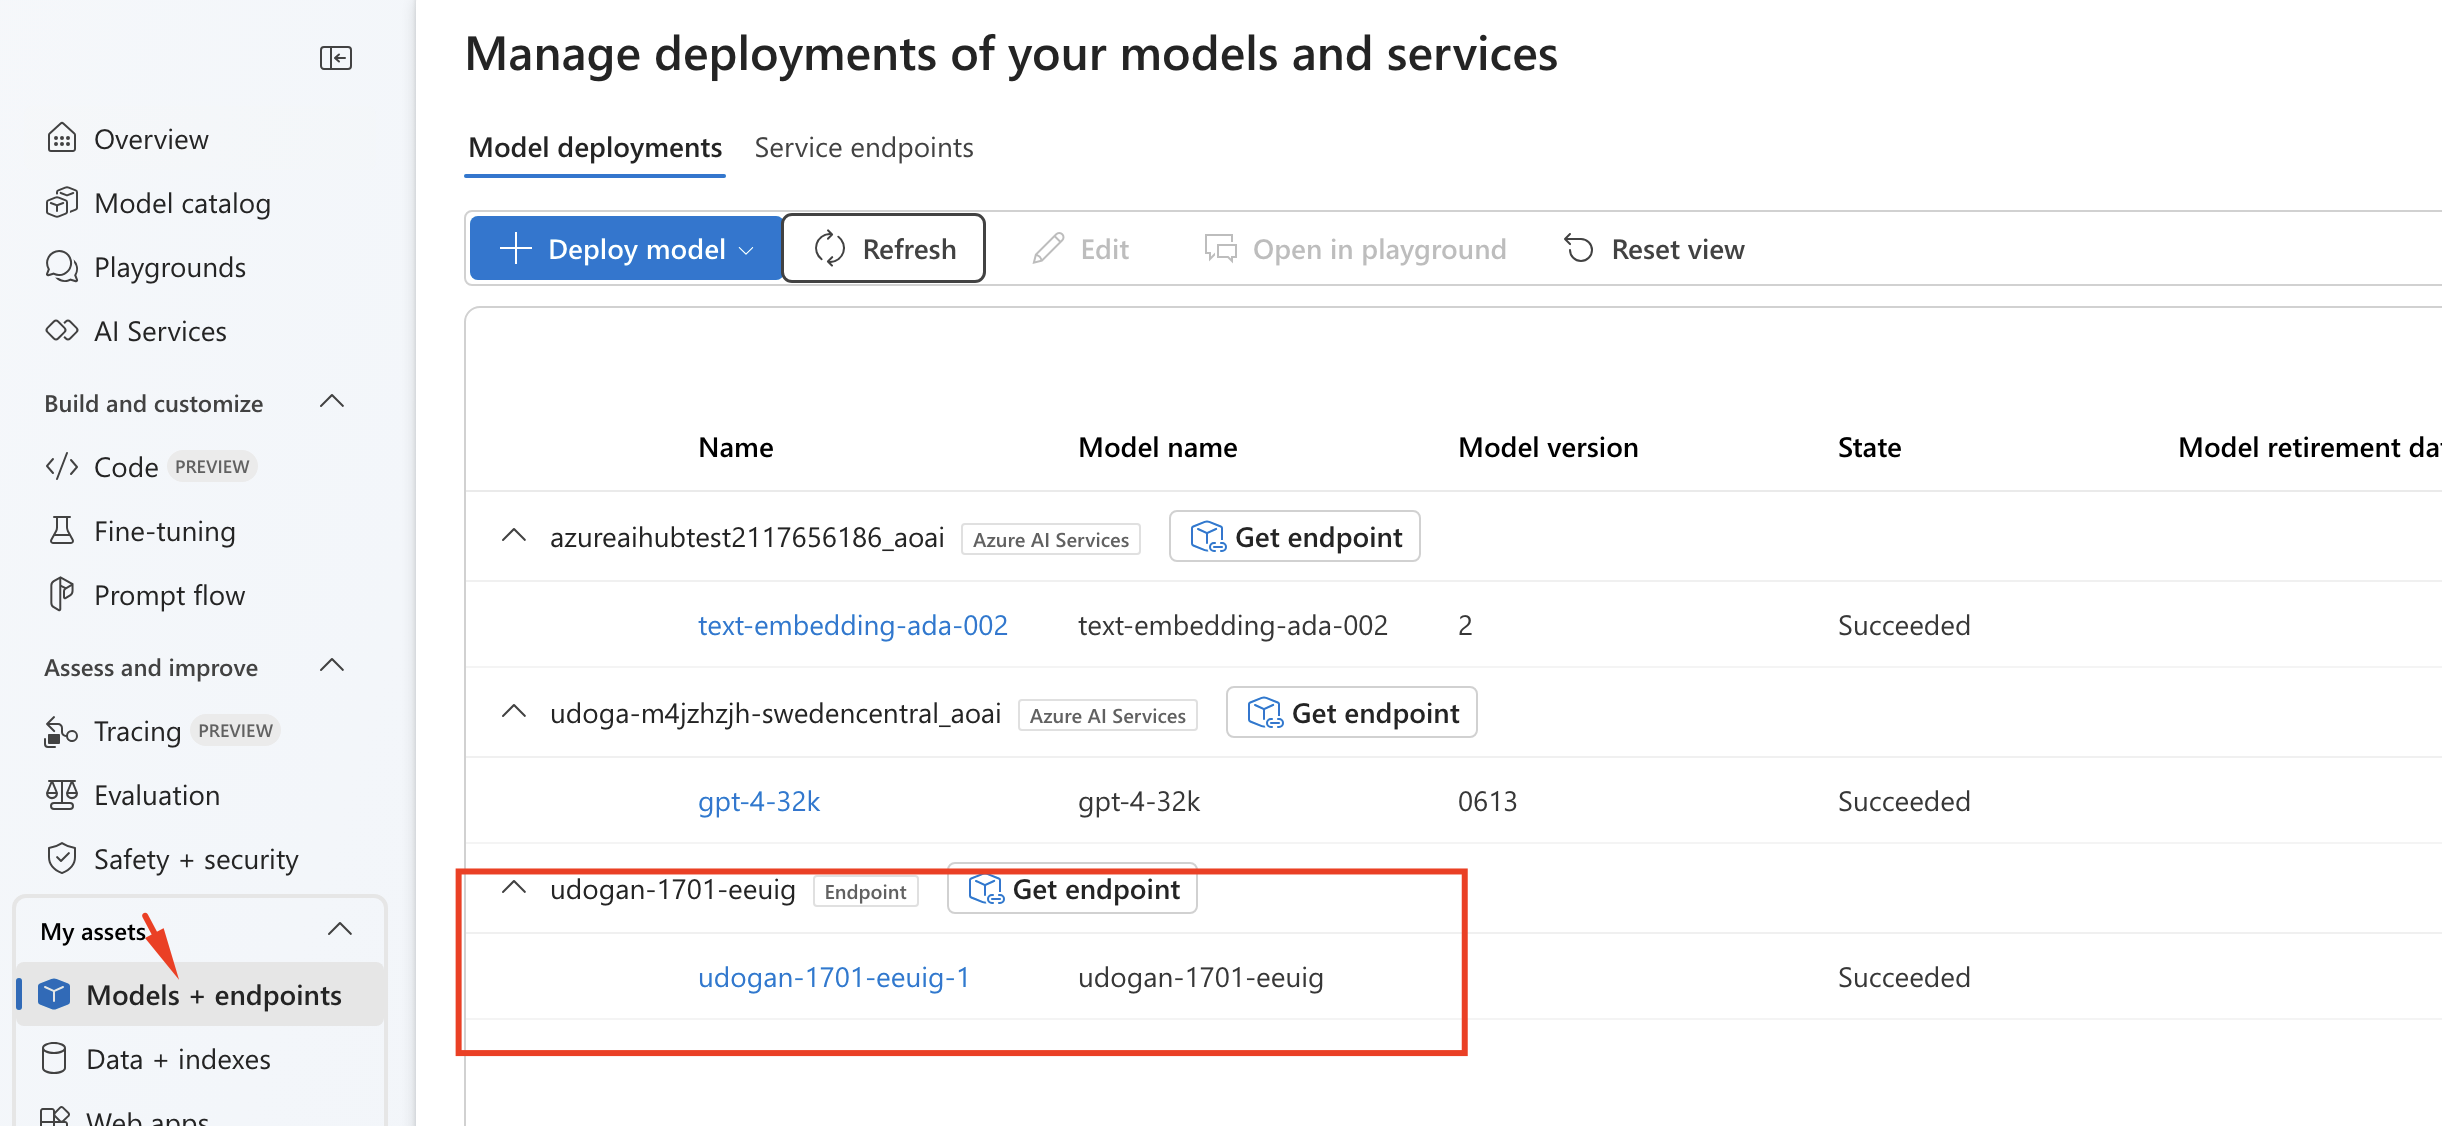
- After couple minutes, endpoint deployment can be seen under Models + endpoints section under My assets and the queries can be tested within deployment.
REST Endpoint Link to heading
- In the Test tab , you can experiment some questions.

- In the Consume tab , you can see the Endpoint and keys to be able to use the service with some examples in different programming languages.
Chat Application Link to heading
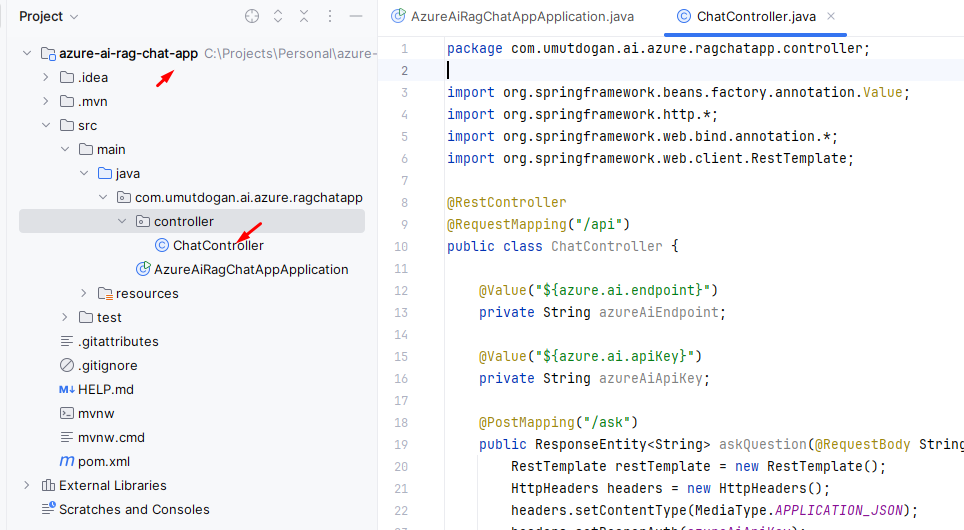
- Now, we’ll create a Spring Boot application that will use the Azure AI endpoint to run queries.
- You can create a new Spring Boot project using Spring Initializr (https://start.spring.io/). Add Spring Web and Spring Boot DevTools dependencies and click Generate button to create the ZIP file, extract the ZIP file and open the project folder with IntelliJ IDEA.
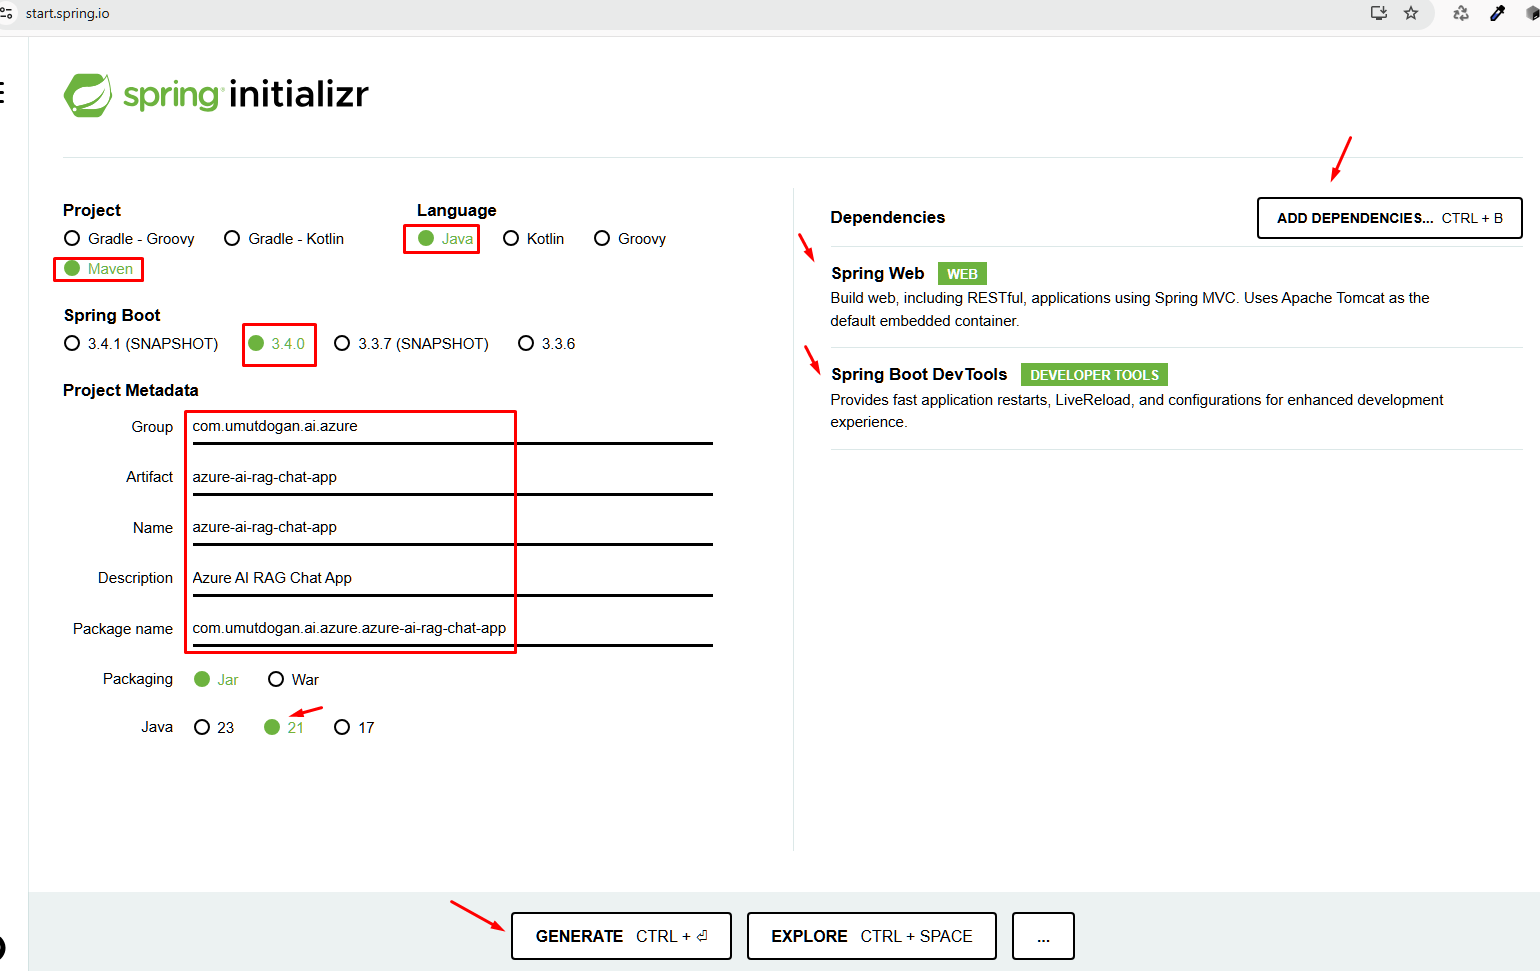
- Instead you can clone the sample repository from My Github repository and open with IntelliJ IDEA or your favorite IDE. Then you can follow instructions in the README.md file of project’s root file and compile and run the web app.


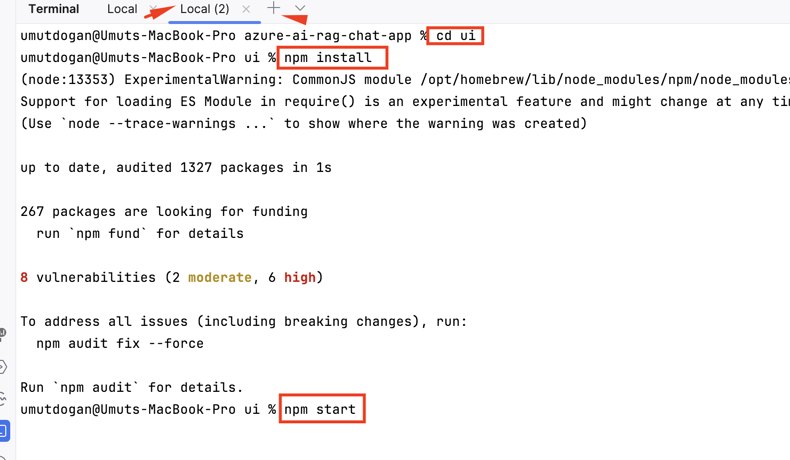

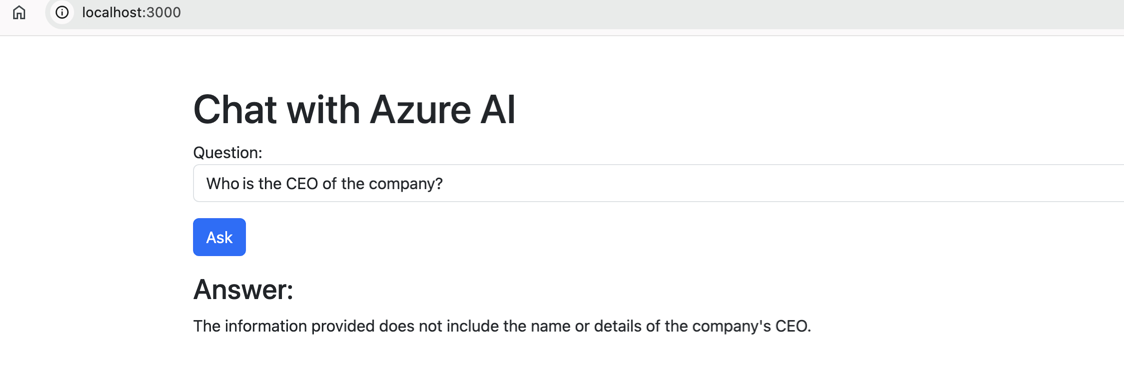
- You can test RAG chat by asking questions to the chatbot from the indexed company document.


- As can be seen only provided information is shared by RAG and general questions are not answered.
References Link to heading
- https://learn.microsoft.com/en-us/training/modules/introduction-to-azure-ai-studio/
- https://learn.microsoft.com/en-us/azure/ai-studio/
- https://en.wikipedia.org/wiki/Retrieval-augmented_generation
- https://azure.microsoft.com/en-us/products/ai-studio
- https://www.youtube.com/watch?v=TyORQKo9NU0
- Documents used for RAG testing